 Save to Pinterest
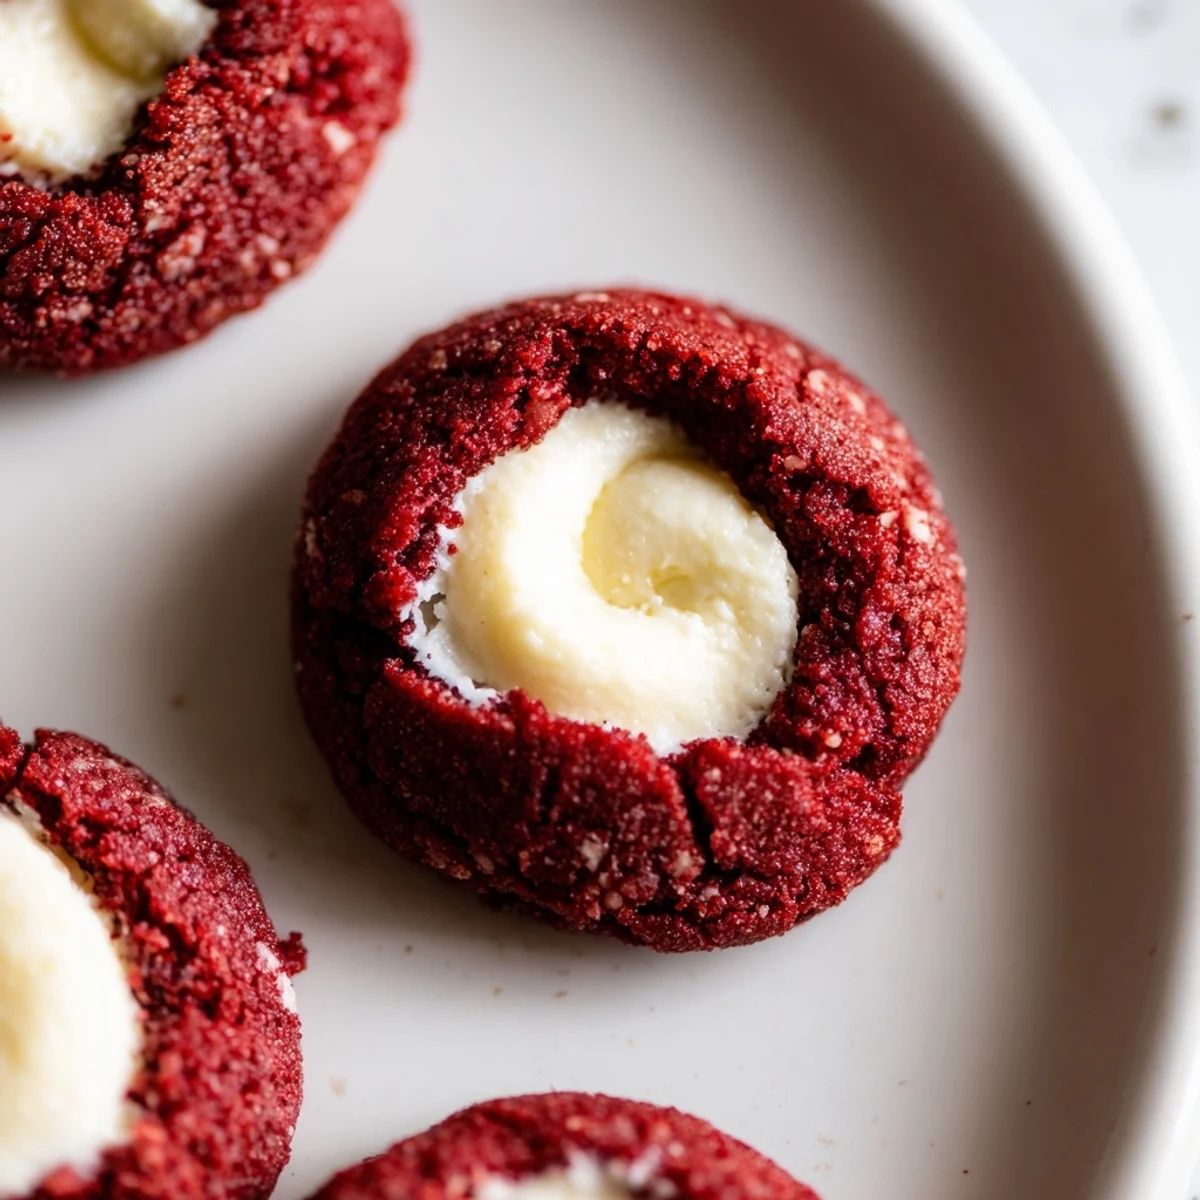
 These red velvet thumbprint cookies feature a rich cocoa dough with classic velvet texture. Each cookie bakes with a tender crumb and centers filled with smooth cream cheese filling that adds tangy sweetness. The vibrant red color makes them stunning for holidays and special celebrations.
The process comes together quickly—mix the dough, roll into balls, create indentations, and fill with the prepared cream cheese mixture. The cookies bake in just 12 minutes until edges are set while centers remain soft. For variation, swap the filling for white chocolate ganache or add festive sprinkles before baking.
The first time I made these, my kitchen looked like a crime scene with red smears everywhere, but the moment I bit into that warm, creamy center, I didn't care one bit about the mess on my countertops.
My sister actually gasped when she saw these on my holiday platter, then proceeded to eat three in a row while standing by the counter, telling me between bites that I was never allowed to show up to family gatherings without them again.
Ingredients
- All-purpose flour: The foundation that gives these cookies their structure, without weighing down that signature velvet texture
- Unsweetened cocoa powder: Just enough to create that subtle chocolate backbone that red velvet is famous for
- Baking soda: Helps these cookies puff up slightly while maintaining that delicate crumb
- Salt: Essential for balancing the sweetness and making all the flavors pop
- Unsalted butter: Room temperature is crucial here, it creates the tender texture we are after
- Granulated sugar: Sweetens and helps create those slightly crisp edges while keeping centers soft
- Egg yolk: Adds richness and contributes to that fudgy, almost brownie like texture
- Whole milk: Brings everything together and adds a subtle creaminess
- Vanilla extract: Pure extract makes all the difference in the final flavor profile
- Red food coloring: Gel coloring works best for achieving that deep red without thinning the dough
- Cream cheese: Must be completely softened to achieve that silky smooth filling texture
- Powdered sugar: Sweetens the filling without adding graininess
Instructions
- Prep your baking space:
- Set your oven to 350°F and line those baking sheets with parchment, having everything ready before you start mixing makes the whole process feel effortless
- Whisk the dry ingredients:
- Combine the flour, cocoa powder, baking soda, and salt in a medium bowl, doing this first prevents overmixing later
- Cream the butter and sugar:
- Beat them together for a full 2 minutes until they are pale and fluffy, this step is what creates that tender texture
- Add the wet ingredients:
- Pour in the egg yolk, milk, vanilla, and red food coloring, mixing until everything is beautifully uniform
- Combine the dough:
- Gradually fold in the dry ingredients just until you no longer see streaks of flour, overmixing will make these tough
- Make the filling:
- Whisk the cream cheese, powdered sugar, and vanilla until completely smooth, set this aside while you shape the cookies
- Shape the cookies:
- Roll the dough into 1 inch balls and place them 2 inches apart on your prepared baking sheets
- Create the thumbprints:
- Gently press your thumb or the back of a teaspoon into the center of each ball, being careful not to go all the way through
- Fill the centers:
- Spoon about half a teaspoon of that cream cheese filling into each indentation, heaping it slightly
- Bake to perfection:
- Slide them into the oven for 11 to 13 minutes until the edges are set but the centers still look slightly soft
- Cool completely:
- Let them rest on the baking sheet for 5 minutes, then transfer to a wire rack to cool completely before serving
 Save to Pinterest
 These cookies have become my go to when I need to bring something that looks impressive but actually comes together quickly, and watching people is face light up when they bite into that surprise filling never gets old.
Make Ahead and Storage
I have learned through experience that the cookie dough balls freeze beautifully for up to 3 months, just thaw them in the fridge overnight before baking and filling.
Filling Variations
Sometimes I swap the cream cheese for white chocolate ganache, heating 4 ounces of white chocolate with 2 tablespoons of heavy cream until smooth, then letting it cool slightly before filling.
Perfect Presentation Tips
A light dusting of powdered sugar over the cooled cookies creates the most beautiful snow dusted effect that makes them look bakery professional.
- Add festive sprinkles immediately after baking while the filling is still slightly warm
- Crushed candy canes pressed gently into the filling make these perfect for Christmas
- A drizzle of melted white chocolate across the cooled cookies adds an elegant finishing touch
 Save to Pinterest
 There is something magical about biting into that deep red exterior and finding that creamy surprise inside, like a little present you baked for yourself.
Recipe FAQs
- → What makes red velvet cookies different from regular chocolate cookies?
-
Red velvet combines cocoa with acidic ingredients like buttermilk or vinegar, though here we use a simpler approach. The signature red color gives these their festive appearance while the cocoa provides subtle chocolate flavor that's less intense than traditional chocolate cookies.
- → Can I make the dough ahead of time?
-
Yes, the dough can be prepared and refrigerated for up to 24 hours before baking. Let it soften slightly at room temperature for 10-15 minutes before rolling into balls, as chilled dough may crack when pressing the thumbprint indentations.
- → How do I prevent the cream cheese filling from overflowing during baking?
-
Fill each indentation with only about ½ teaspoon of filling—avoid overfilling. The filling will spread slightly as bakes but should stay contained. If it does bubble over, the cookies will still taste delicious though may appear less uniform.
- → Can I use natural food coloring instead of red dye?
-
Beet juice or pomegranate juice can provide red tint naturally, though the color will be more muted than gel or liquid food coloring. Start with 1 tablespoon and add more as needed to achieve desired vibrancy without making the dough too wet.
- → What's the best way to store these cookies?
-
Keep in an airtight container in the refrigerator for up to 4 days due to the cream cheese filling. Bring to room temperature 15 minutes before serving for the best texture and flavor. The cookies can also be frozen unfilled for up to 3 months.
- → Why did my cookies lose their red color after baking?
-
Some color fading occurs during baking due to heat exposure. Using gel food coloring rather than liquid helps maintain vibrancy. Adding a bit more coloring than called for can compensate, though avoid overdoing it as it may affect taste slightly.