 Save to Pinterest
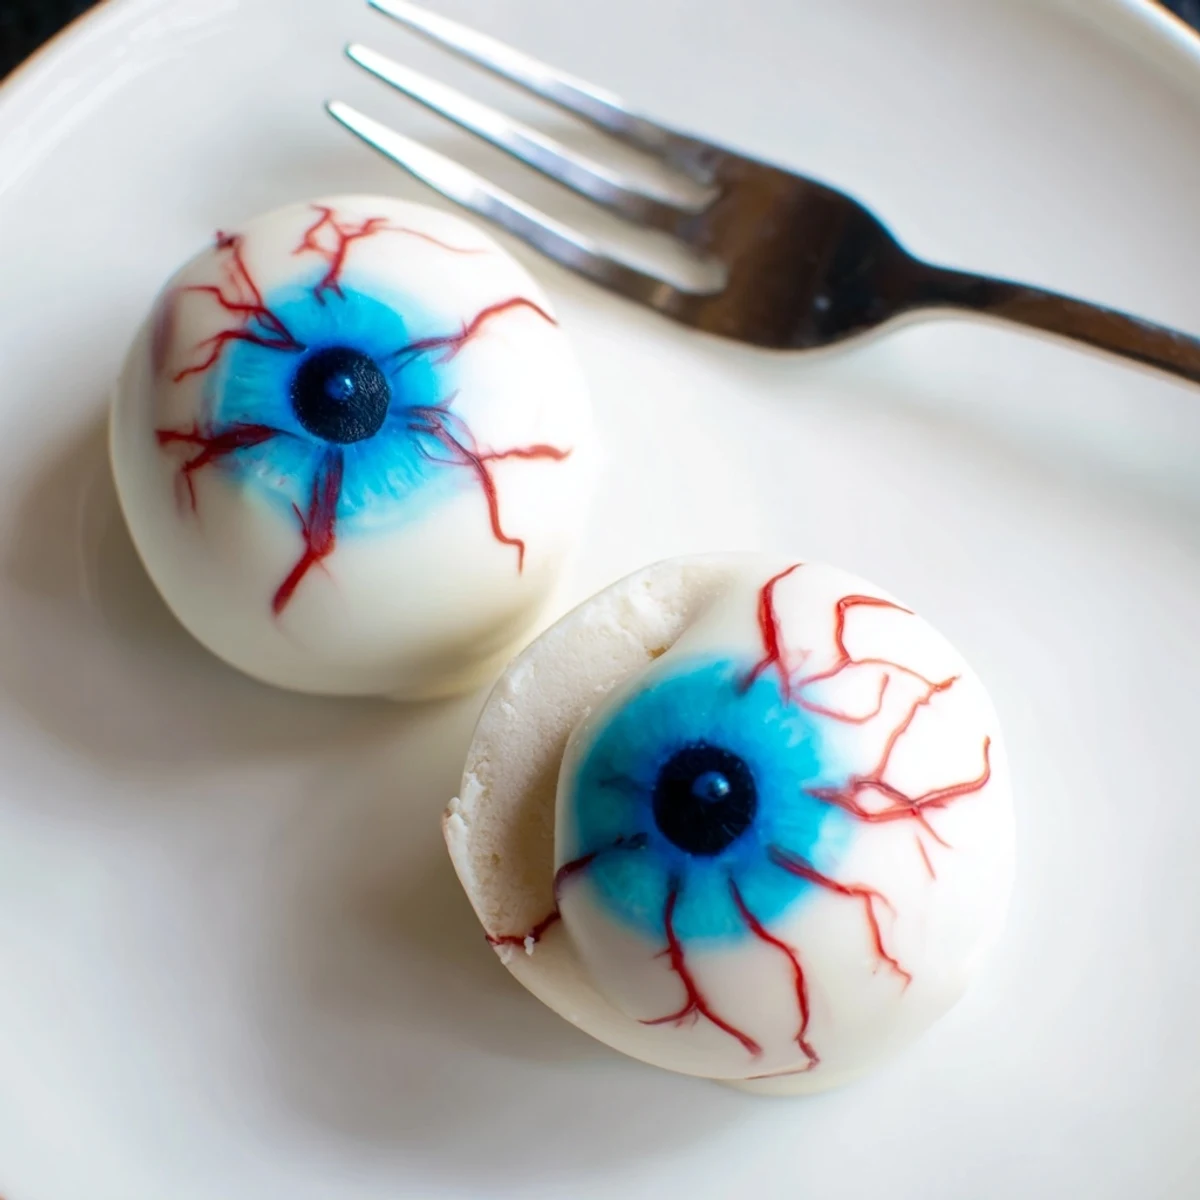
 These Halloween cake eyeballs transform moist vanilla cake and creamy frosting into spooky party treats. After crumbling a cooled vanilla cake, mix it with a rich cream cheese-butter frosting, then roll into balls. Dip each ball in melted white chocolate, creating the perfect canvas for detailed decoration. Add colorful irises using blue or green candy melts, then finish with dark chocolate pupils and red gel veins for that authentic eerie look. The combination of soft cake interior and crisp chocolate coating creates a satisfying texture contrast. Best served chilled, these eyeballs stay firm and hold their shape perfectly at room temperature during parties. They're vegetarian-friendly and make 24 servings, ideal for Halloween gatherings or kids' celebrations.
My daughter came home from school last October absolutely determined that our Halloween party needed something that would make her friends scream and reach for seconds at the same time. We spent an entire Sunday afternoon covered in chocolate and food coloring, turning my pristine kitchen into what looked like a laboratory experiment gone wrong. Those first few eyeballs were lopsided and the veins looked more like squiggly spaghetti than blood vessels, but something about making them together stuck with me. Now it is not Halloween in our house until a batch of these googly treats is chilling in the refrigerator.
Last year my neighbor asked me to bring dessert to her annual Halloween potluck, and I nearly doubled the recipe because I was worried they might not be enough. I walked in with three dozen cake eyeballs arranged on a platter, and within fifteen minutes, the only thing left were a few smears of red gel and confused guests asking who made the scary delicious things. One dad actually told me he had to eat three just to convince himself they were not real.
Ingredients
- Vanilla cake mix or homemade cake: I have used both and honestly nobody can tell the difference once these are coated in chocolate and decorated
- Cream cheese and butter: Room temperature is non negotiable here or your filling will turn lumpy and refuse to blend smoothly
- White candy melts: These coat more evenly than actual white chocolate and set up harder so your eyeballs do not melt at room temperature
- Colored candy melts or icing: Blue and green look the most realistic for irises but purple or yellow works for a more supernatural vibe
- Red gel food coloring: Liquid coloring will make your chocolate seize up and turn into a grainy mess so gel is absolutely essential
Instructions
- Bake and cool your cake completely:
- Warm cake will turn your pops into mushy disasters that refuse to hold their shape so patience at this stage saves so much frustration later
- Crumble the cake into fine crumbs:
- I use my hands to break everything down until no large chunks remain, which helps the mixture bind together perfectly
- Beat the frosting until silky smooth:
- Give your cream cheese and butter at least three minutes on medium high speed so the final filling melts in your mouth
- Combine crumbs and frosting:
- Mix slowly at first or you will end up with powder flying everywhere then increase speed until the mixture holds together when squeezed
- Roll and chill the balls:
- Twenty minutes in the freezer firms them up just enough for dipping without making the coating crack from temperature shock
- Coat with white chocolate:
- Tap off the excess chocolate gently and let them set on parchment paper rather than trying to rush the process
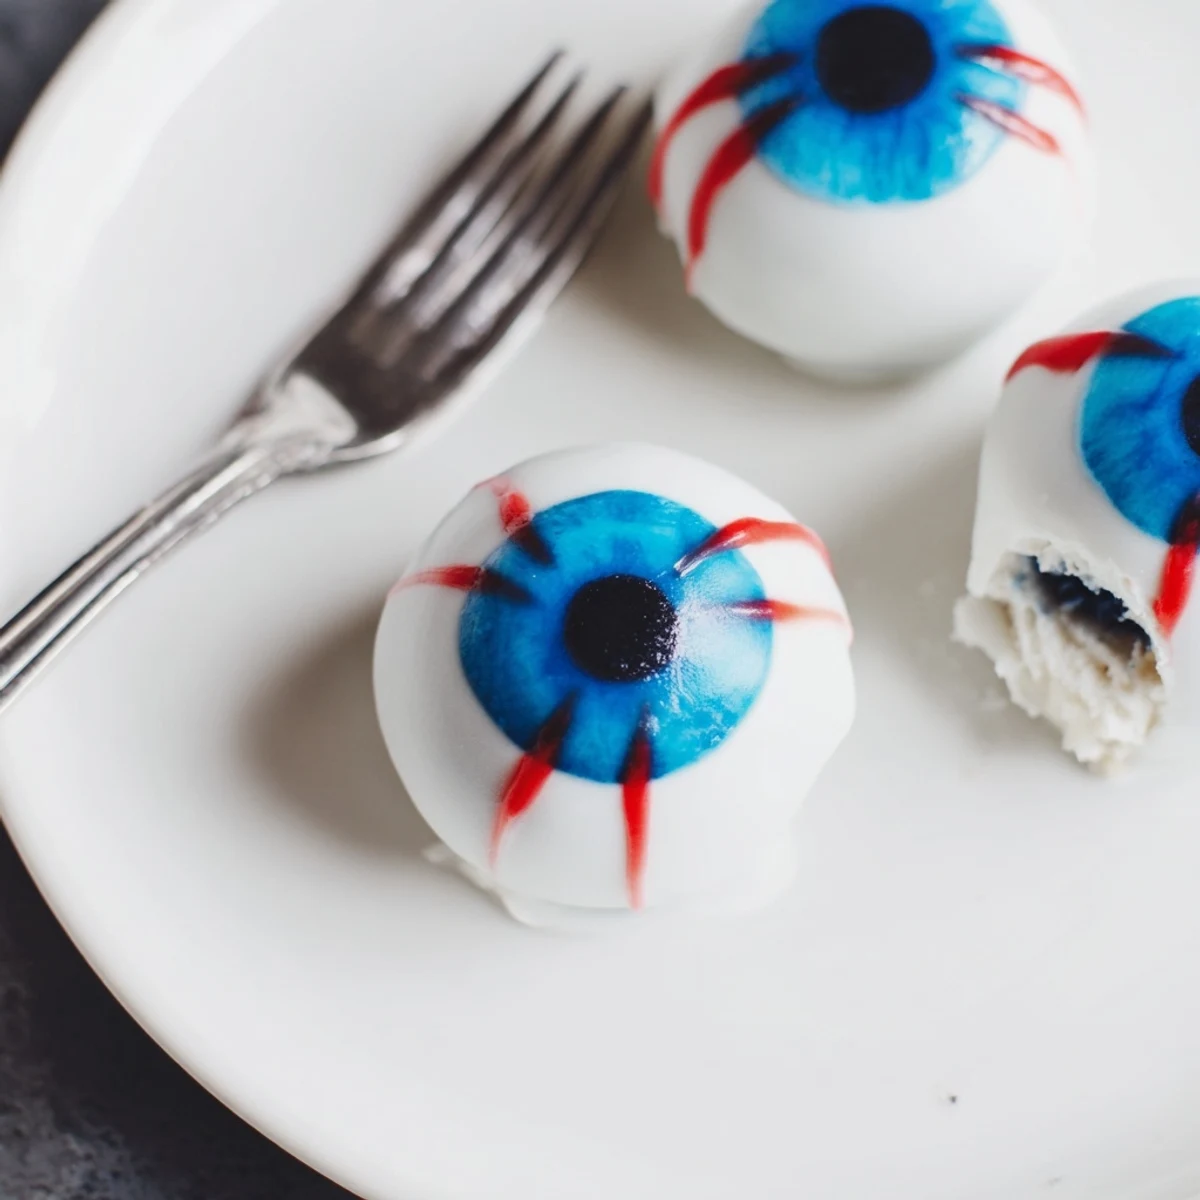
- Add the colored iris:
- Work quickly while the white coating is still tacky so your iris dots adhere without sliding right off the surface
- Create pupils and finish:
- The dark chocolate pupil should be slightly off center for a more realistic look then draw your red veins with a very light hand
 Save to Pinterest
 My niece helped me make a batch last year and she decided that pink irises and gold pupils were the way to go instead of the traditional colors. Her creative interpretation ended up being the conversation starter of the entire night, with everyone debating whether they were alien eyes or magical creature treats. Sometimes breaking away from the instructions creates the most memorable moments.
Making Them Ahead
I have learned through experience that these actually taste better after sitting in the refrigerator overnight. The flavors meld together and the coating firms up perfectly, which makes them easier to transport to parties without any unfortunate melting incidents.
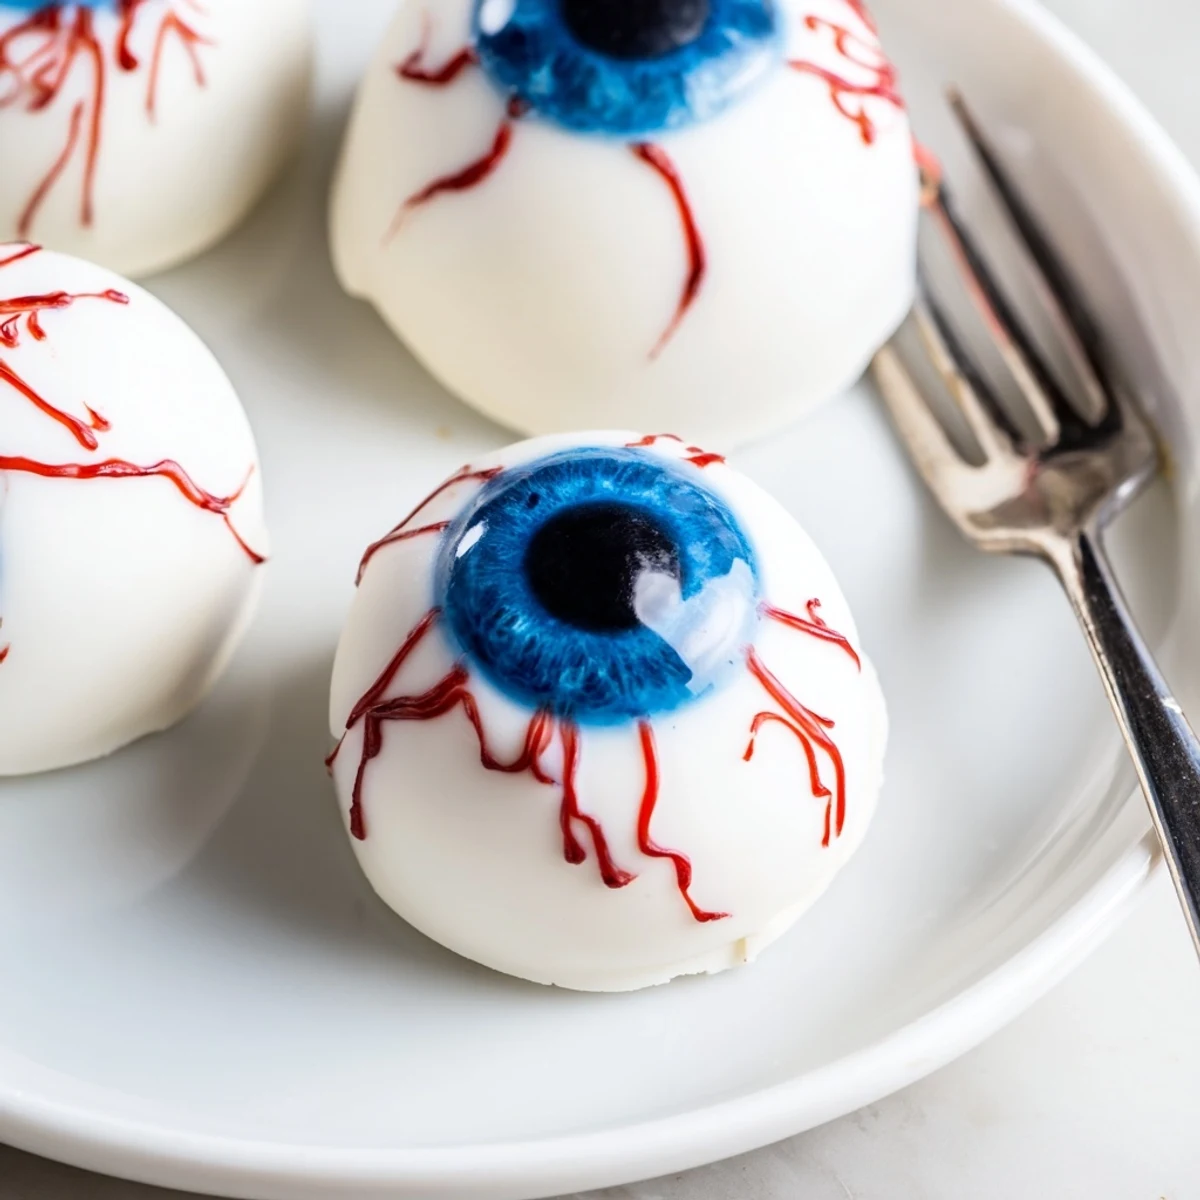
Serving Suggestions
Arrange them on a dark platter or slab cake stand to make those spooky veins really pop against the background. A few plastic spiders scattered around the platter take the presentation from cute to genuinely creepy in seconds.
Storage And Handling
Keep these layered between wax paper in an airtight container and they will stay perfectly creepy for up to a week. The texture holds up beautifully but I recommend serving them chilled rather than at room temperature for the best experience.
- If you are transporting these, pack them in a single layer so the delicate decorations do not get smushed
- A small cooler with ice packs works wonders for outdoor autumn events where chocolate might otherwise soften
- Leftovers (if you somehow have any) freeze surprisingly well for up to a month
 Save to Pinterest
 There is something wonderfully satisfying about serving treats that make people squirm just a little before they take that first bite and realize they are absolutely delicious. Happy haunting in your kitchen this season.
Recipe FAQs
- → How far ahead can I make these Halloween eyeballs?
-
Prepare these up to 3 days in advance and store in an airtight container in the refrigerator. The chocolate coating helps maintain freshness and prevents the cake from drying out.
- → Can I use homemade cake instead of cake mix?
-
Absolutely. Use any vanilla cake recipe weighing approximately 400g once baked and cooled. The texture works perfectly for crumbling and shaping into balls.
- → What's the best way to melt the chocolate coating?
-
Melt white chocolate in 20-second intervals in the microwave, stirring between each session. Or use a double boiler on low heat, being careful not to get any water in the chocolate as it will seize.
- → Do I need cake pop sticks for these eyeballs?
-
No sticks required. These are designed as bite-sized balls to be eaten by hand or with a small fork. The chocolate coating provides enough structure to hold them together without sticks.
- → How do I prevent the cake balls from falling apart when dipping?
-
Chilling the shaped balls in the freezer for 20 minutes before dipping is crucial. This firms the mixture and helps the chocolate coating set quickly. Work in small batches to keep them cold.
- → Can I make these gluten-free?
-
Yes, use a gluten-free vanilla cake mix or gluten-free flour blend in your homemade cake. Ensure all candy melts and decorations are certified gluten-free as well.