Save to Pinterest
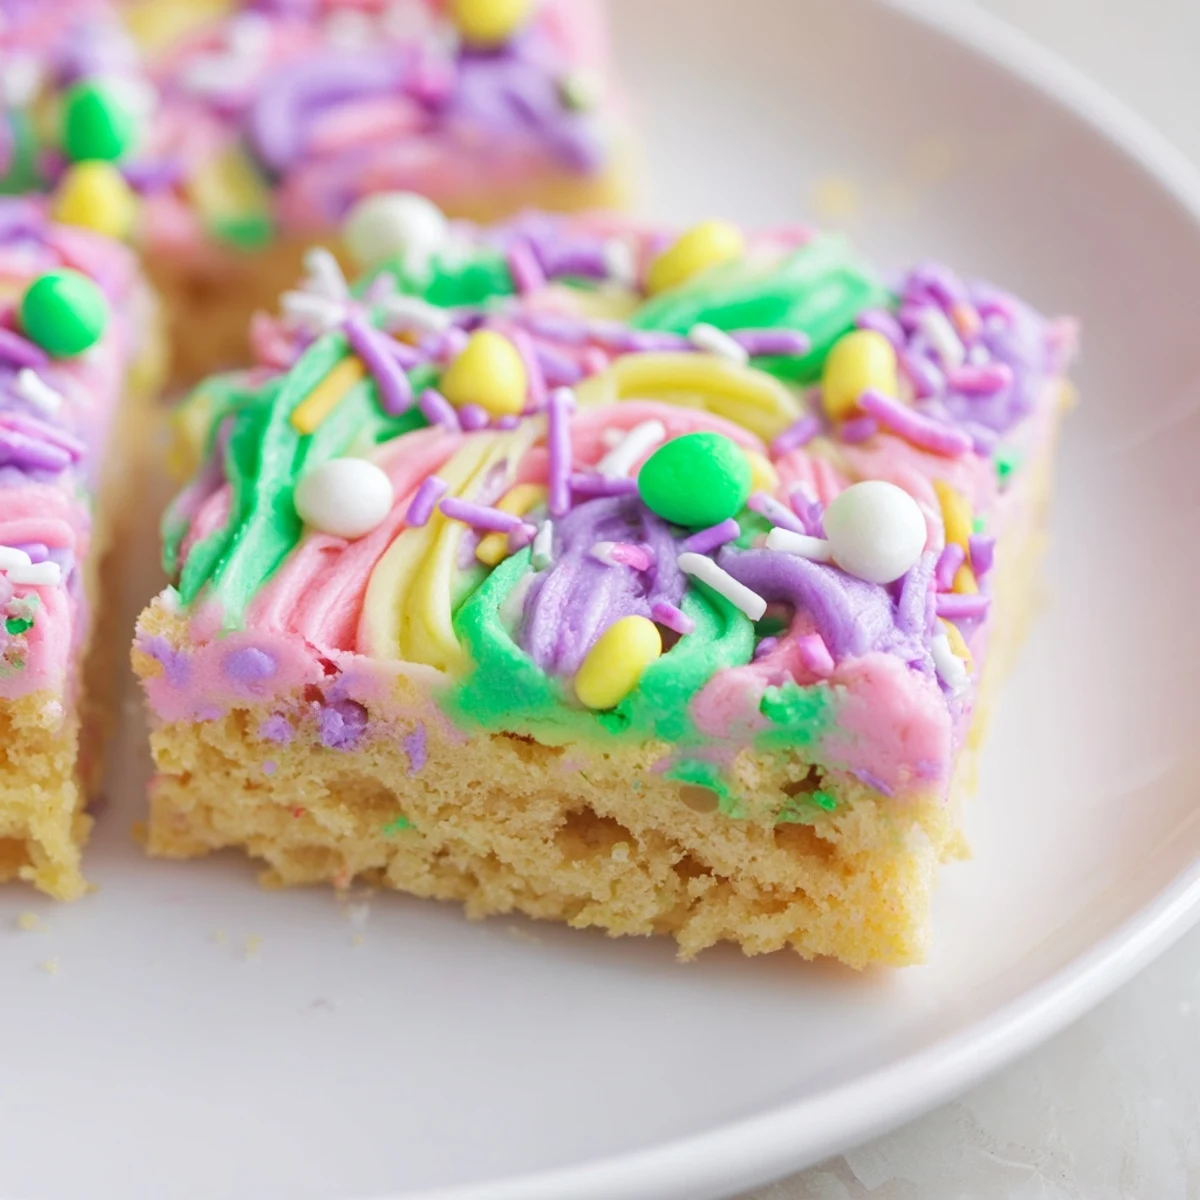
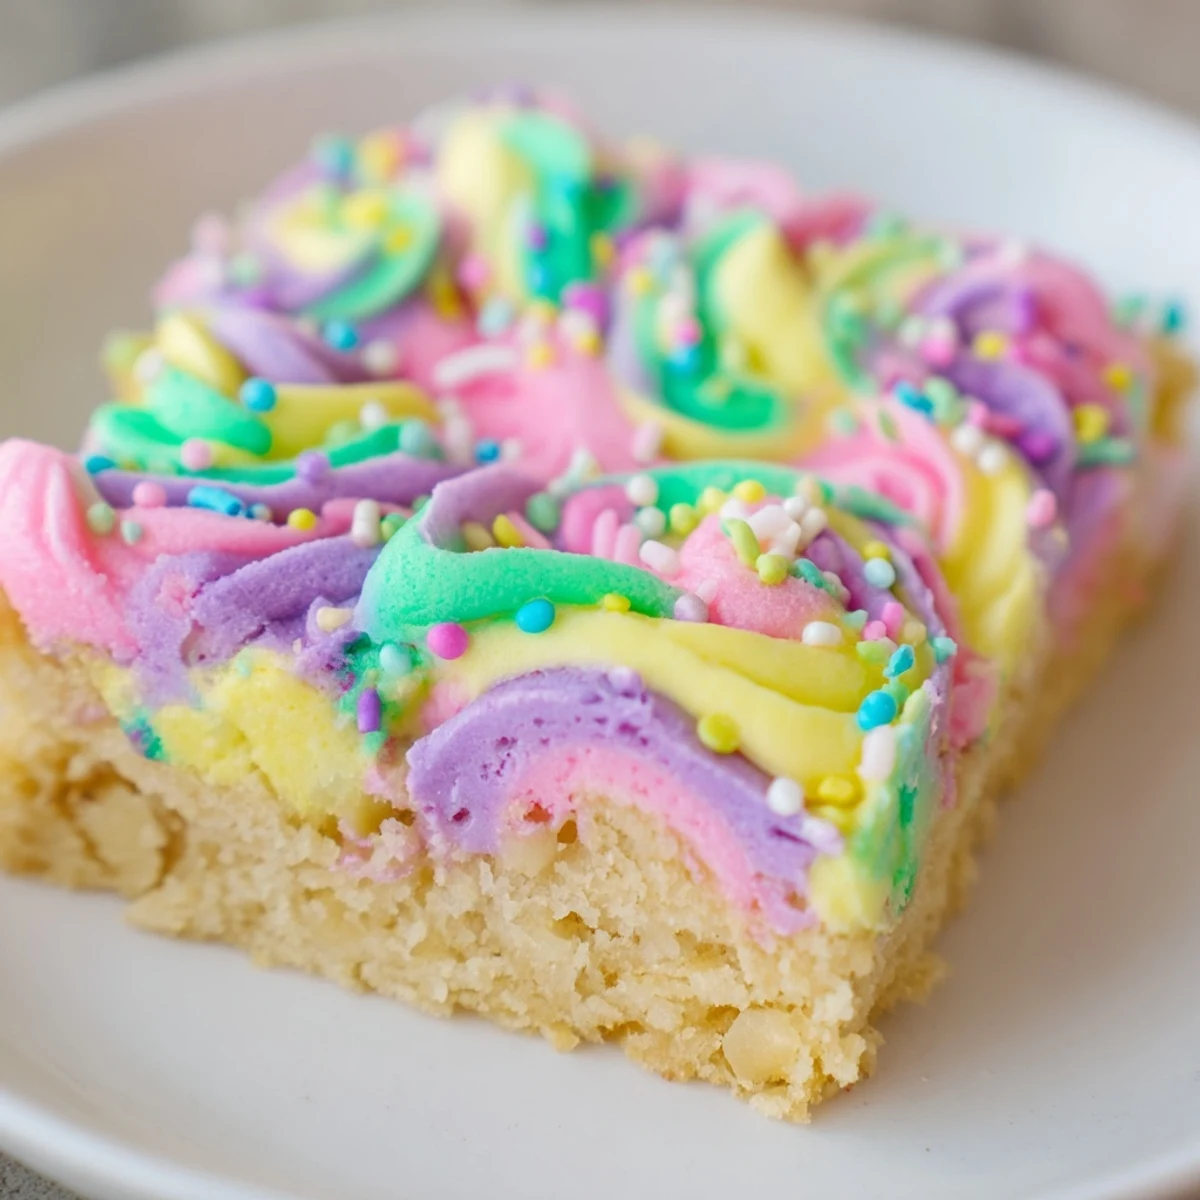
 These soft, tender bars feature a classic sugar cookie base baked in a 9x13 inch pan until just golden. The creamy frosting gets tinted in pastel shades of pink, yellow, green, or purple, then spread generously over the cooled cookie layer. Top with festive Easter sprinkles for that holiday touch.
The dough comes together quickly by creaming butter and sugar, adding eggs and extracts, then incorporating the dry ingredients. After baking and cooling completely, the frosting is whipped until smooth and fluffy. Divide the frosting to create multiple pastel colors, or keep it classic white.
These bars are ideal for Easter brunch, dessert tables, or packaging as gifts. The slice-and-serve format makes them perfect for sharing. They keep well for several days, allowing you to prepare them ahead of your celebration.
Last Easter, my daughter asked why we always did cookies when bars were so much easier to share. I had no good answer except tradition, so we tried something new. The kitchen smelled like vanilla and butter all afternoon, with pastel bowls lined up like little spring clouds waiting to become frosting. Now these bars are the first thing she asks for when the calendar turns to April.
My sister-in-law brought these to our family egg hunt last year, and I honestly forgot about the actual eggs. We all stood around the kitchen island, barely listening to the kids counting their chocolate finds, because we were too busy debating which frosting color was best. The yellow one won, but I think that was just because it matched the daffodils on the table.
Ingredients
- All-purpose flour (2 1/4 cups): The foundation that gives these bars their structure without becoming tough or dry
- Baking powder (1/2 teaspoon): Just enough lift to make the bars tender and light, not dense or cakey
- Salt (1/4 teaspoon): Balances the sweetness and brings out the vanilla flavor
- Unsalted butter (1/2 cup for dough + 1/2 cup for frosting): Room temperature butter is non-negotiable here—it creates that melt-in-your-mouth texture
- Granulated sugar (1 cup): Creamed with butter until fluffy, this creates the tender crumb structure
- Large eggs (2): Bind everything together and add richness
- Pure vanilla extract (1 teaspoon for dough + 1/2 teaspoon for frosting): Use the good stuff because it really shines in simple recipes
- Almond extract (1/2 teaspoon, optional): My secret addition that makes people ask what makes these different
- Powdered sugar (2 cups): Sift it first or you will get lumps in your frosting
- Whole milk or cream (2–3 tablespoons): Adjust this to get your frosting exactly how you like it
- Pastel food coloring: Gel colors work better than liquid for achieving soft, Easter-egg shades
- Easter sprinkles: Add these immediately after frosting before it sets
Instructions
- Get your oven and pan ready:
- Preheat to 350°F and line your 9x13 pan with parchment, letting the edges hang over like a little sling for easy lifting later
- Whisk your dry ingredients:
- Combine the flour, baking powder, and salt in a medium bowl so they are evenly distributed
- Cream the butter and sugar:
- Beat them together until they are pale and fluffy, about 3 minutes—this step is what makes the bars tender
- Add the eggs and extracts:
- Beat in the eggs one at a time, then mix in the vanilla and almond extract until everything is incorporated
- Combine the mixtures:
- Gradually add the dry ingredients to the wet, mixing just until no flour streaks remain—overmixing makes tough bars
- Spread and bake:
- Press the dough evenly into your prepared pan and bake 18 to 20 minutes until the edges are barely golden
- Let them cool completely:
- This is hard but essential—warm bars will melt your frosting into a sad, soupy mess
- Make the frosting:
- Beat the butter until creamy, add powdered sugar, vanilla, and 2 tablespoons milk, then whip until fluffy
- Add the colors:
- Divide frosting into bowls and tint each with pastel coloring, using toothpicks to add gel color gradually
- Frost and decorate:
- Spread the frosting over the cooled bars and shower with sprinkles while the frosting is still soft
- Cut and serve:
- Use the parchment overhang to lift the whole thing out, then cut into squares with a sharp knife
 Save to Pinterest
 My grandmother always said Easter desserts should look like spring on a plate, something that makes you smile before you even take a bite. These bars became our new tradition because they do exactly that—soft pillows of cookie topped with colors that make everyone feel like a kid again, hunting eggs in the grass and believing in magic.
Making Ahead and Storage
I have learned through multiple Easter mornings that these bars actually taste better on day two. The frosting has time to meld with the cookie base, creating this perfect marriage of textures. Wrap the uncut, frosted bars tightly in plastic and they will sit happily on your counter for up to four days. If you need to make them further in advance, freeze the unfrosted base wrapped in plastic and foil, then thaw and frost the day of your gathering.
Getting the Perfect Frosting Colors
After several years of accidentally making neon green instead of soft mint, I have learned that less coloring is always more. Dip a toothpick into your gel color and swirl it into the frosting, adding more tiny bit by tiny bit until you reach those soft pastel shades we associate with Easter. Gel colors are so concentrated that even the smallest amount packs a punch. If you want that swirled look, drop dollops of different colored frosting randomly on the bars and gently swirl them together with an offset spatula—do not overmix or you will end up with muddy grayish frosting.
Serving and Presentation Ideas
These bars are the ultimate contribution to any Easter gathering because they travel beautifully and serve a crowd. Arrange them on a pretty platter surrounded by jelly beans or place each bar in a colorful cupcake liner for individual servings. I have also cut them into egg shapes using a cookie cutter for extra Easter points, though the scraps from that method are dangerous to keep around.
- Try pressing the sprinkles gently into the frosting so they stick without falling off during transport
- For a stunning presentation, pipe the frosting in rows of different colors using a large open star tip
- These bars pair perfectly with a cup of coffee or even a glass of cold milk for the kids
 Save to Pinterest
 However you serve them, these bars are guaranteed to become part of your Easter story too. Happy baking, and may your spring be filled with sweet moments and even sweeter memories.
Recipe FAQs
- → Can I make the cookie dough ahead of time?
-
Yes, prepare the dough up to 2 days in advance and store it wrapped tightly in the refrigerator. Bring to room temperature slightly before pressing into the pan for easier spreading.
- → What's the best way to achieve soft cookie bars?
-
The key is removing the bars from the oven when the edges are barely golden and the center appears set. They continue cooking slightly as they cool, resulting in a tender texture throughout.
- → Can I use natural food coloring for the frosting?
-
Absolutely. Fruit and vegetable-based powders like beet, raspberry, turmeric, matcha, or blueberry work beautifully for creating pastel shades without artificial dyes.
- → How should I store these bars?
-
Keep in an airtight container at room temperature for up to 4 days, or refrigerate for up to 1 week. Bring to room temperature before serving for the best texture and flavor.
- → Can I freeze these Easter cookie bars?
-
Freeze unfrosted bars wrapped tightly for up to 3 months. Thaw overnight at room temperature, then frost and decorate. Frosted bars can be frozen individually on a parchment-lined tray before transferring to a container.
- → What size pan works best for these bars?
-
A 9x13 inch pan creates bars with ideal thickness. An 8x8 inch pan yields thicker bars but may require longer baking time. Adjust accordingly and watch for doneness.