 Save to Pinterest
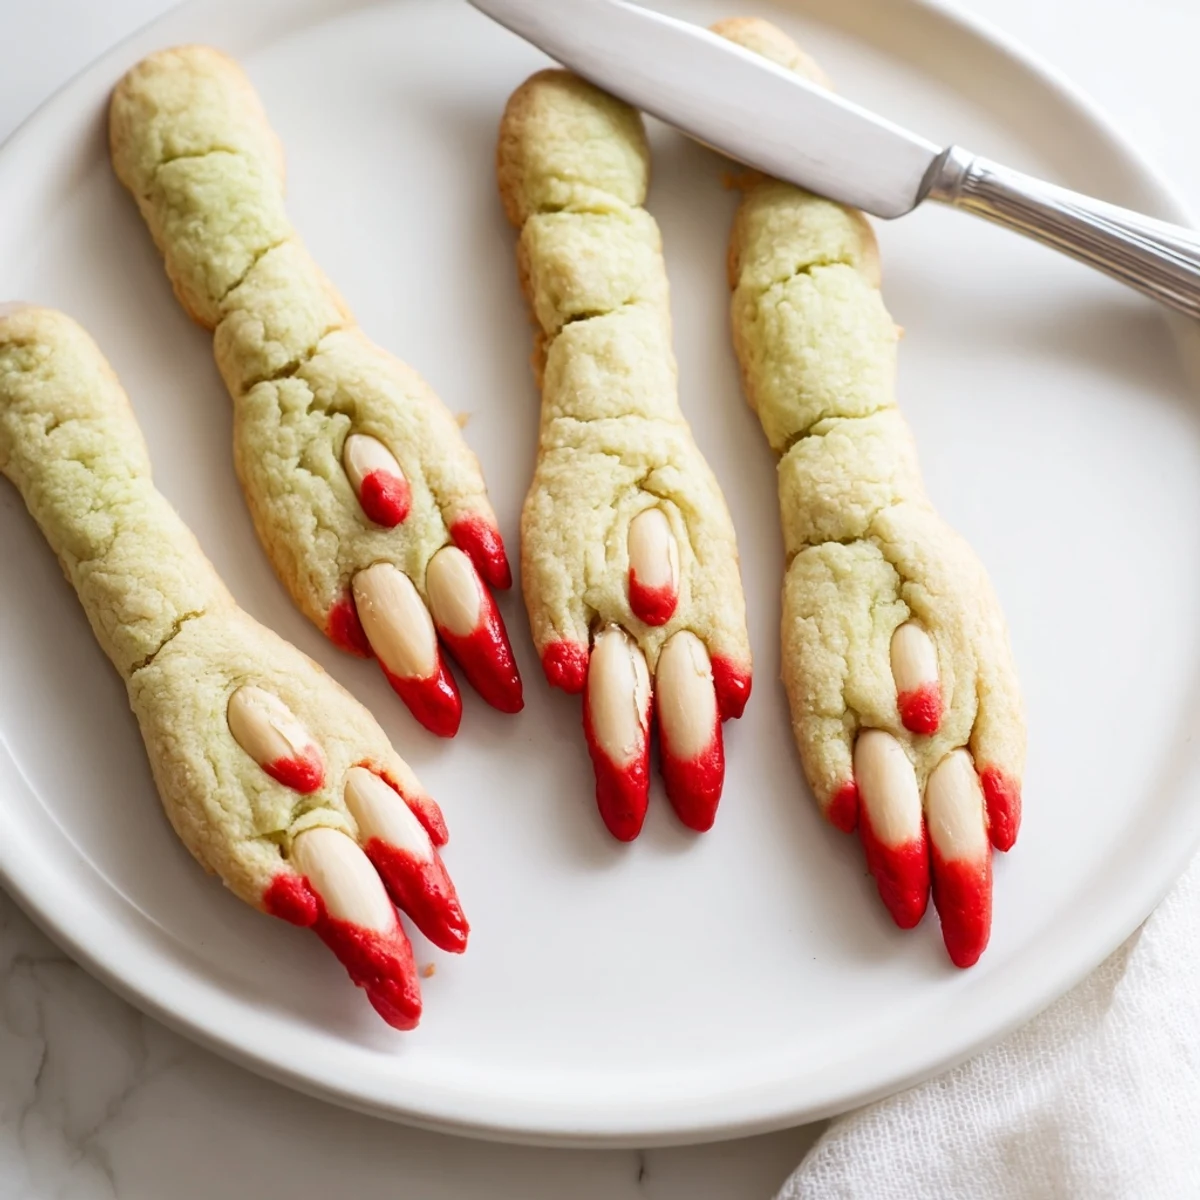
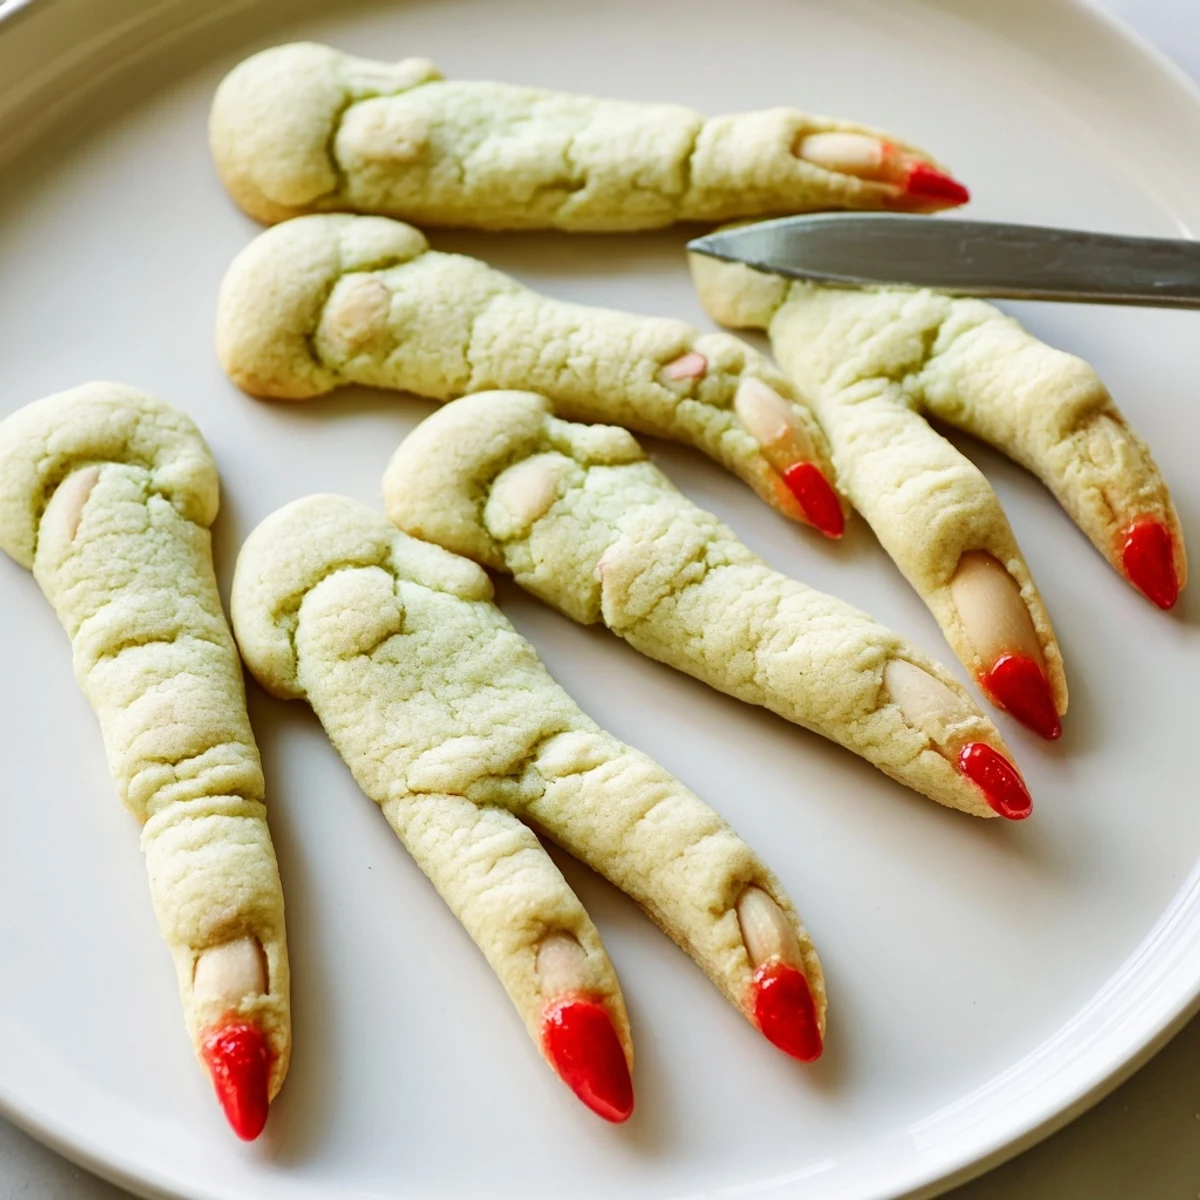
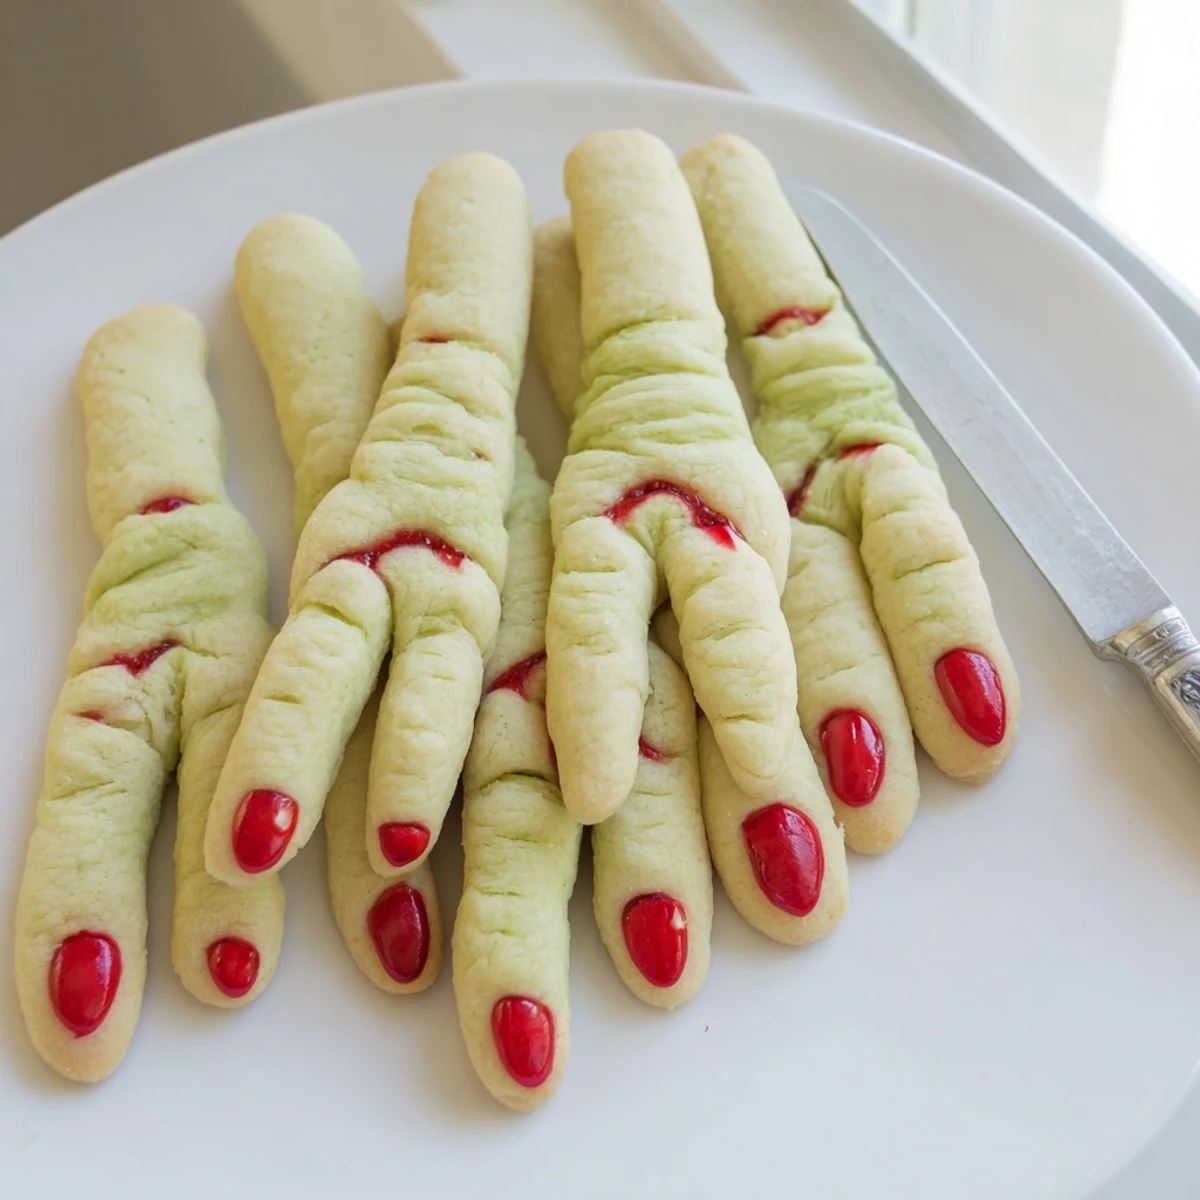
 These eerie witch finger cookies combine buttery almond-flavored dough with creepy details like knuckle lines and bloody fingernails made from red gel or strawberry jam. Each finger-shaped cookie features a blanched almond pressed into the tip, creating a realistic fingernail effect that's sure to delight and spook your Halloween party guests.
The simple dough comes together quickly with creamed butter and sugar, vanilla and almond extracts, plus basic pantry staples. Shaping the cookies takes a bit of creativity—just roll portions into finger-length cylinders, score knuckle lines with a knife, and press an almond nail into one end.
Bake until lightly golden, then add the gruesome finishing touch by dabbing red coloring or jam under each almond before pressing it back into place. The result is a plateful of creepy, delicious treats that taste as good as they look.
Last Halloween, my niece watched me roll the first batch of these cookies and absolutely refused to taste one for three whole hours. She finally caved when I showed her how to snap off the "fingernail" and smear the red jam herself, giggling the entire time. Now she asks in July if we can make the scary fingers again.
I brought a plate to my office potluck last October and watched my normally serious coworker do a double take before slowly reaching for one. The whole break room ended up crowded around the platter, people daring each other to take the first bite and competing over who could make the most convincing knuckle creases. Someone eventually asked for the recipe between mouthfuls.
Ingredients
- Unsalted butter: Softening this completely at room temperature prevents gritty cookies and gives you that melt in your mouth texture
- Granulated sugar: Creaming this thoroughly with the butter creates the tender crumb structure
- Large egg: Room temperature eggs incorporate better into the dough
- Pure vanilla and almond extract: This combination is essential and almond extract specifically gives these cookies their signature flavor
- All purpose flour: Measured properly, either by weighing or fluffing and scooping, keeps the dough workable
- Baking powder: Just enough lift to keep the fingers from spreading too thin
- Salt: Balances the sweetness and enhances the almond flavor
- Whole blanched almonds: These make the most realistic looking fingernails and stay secure during baking
- Red gel food coloring or strawberry jam: The gel dries better but jam tastes better and looks appropriately gruesome
Instructions
- Preheat your oven:
- Set it to 325°F and line two baking sheets with parchment paper so nothing sticks
- Cream the butter and sugar:
- Beat them together until the mixture looks pale and fluffy, which takes about three minutes with an electric mixer
- Add the wet ingredients:
- Mix in the egg, vanilla extract, and almond extract until everything is smooth and combined
- Whisk the dry ingredients:
- In a separate bowl, combine the flour, baking powder, and salt so they distribute evenly
- Combine everything:
- Gradually add the flour mixture to the butter mixture, mixing just until a dough forms
- Shape the fingers:
- Scoop about one tablespoon of dough and roll it between your palms into a cylinder that is three to four inches long
- Add the details:
- Use a knife to gently score three lines for knuckles and press a blanched almond into one end for the fingernail
- Arrange and bake:
- Place the fingers on the prepared baking sheets about two inches apart and bake for 18 to 20 minutes until lightly golden
- Create the bloody effect:
- Remove the almonds carefully, dab some red food coloring or jam underneath, and press the almonds back into place
- Cool completely:
- Let the cookies finish cooling on a wire rack so they set properly
 Save to Pinterest
 My friend tested these on her kids who normally pick off anything that looks too homemade, and they fought over the last creepy cookie. She said the best part was watching her six year old explain to his little sister that the red part was definitely just jam, probably.
Getting Creepier With Color
Tinting small portions of dough with green or pale gray food coloring creates_variety that makes the platter look even more unsettling. I have found that a tiny amount goes a long way and too much color can make the cookies look less realistic.
Making Them Ahead
The dough keeps in the refrigerator for up to three days or freezes well for a month. Shape and chill the raw fingers on parchment paper, then transfer them to a freezer bag and bake straight from frozen, adding just a few extra minutes.
Serving Suggestions
These work wonderfully alongside hot apple cider or as part of a dessert spread with chocolate themed treats. The buttery almond flavor actually pairs surprisingly well with tart cherry or blackberry preserves too.
- Arrange them in a circle reaching out from a bowl of dip for maximum impact
- Tuck a few onto each dessert plate as a garnish for Halloween cakes or pies
- Stack them in clear treat bags tied with orange ribbon for party favors
 Save to Pinterest
 Hope your Halloween gathering is equal parts spooky and sweet this year.
Recipe FAQs
- → How far ahead can I make these witch finger cookies?
-
You can prepare the dough up to 2 days in advance and store it refrigerated. Shape and bake when ready. Once baked, the cookies stay fresh in an airtight container for up to 5 days, making them perfect for preparing ahead of Halloween parties.
- → Can I freeze these Halloween cookies?
-
Yes, freeze baked cookies in a single layer on a baking sheet until firm, then transfer to a freezer-safe container for up to 3 months. Thaw at room temperature before adding the bloody fingernail details for best results.
- → What can I use instead of almonds for the fingernails?
-
If you need to avoid nuts, try pressing a small piece of white chocolate, a candy corn tip, or even a piece of pistachio into the dough. You could also shape a small ball of dough tinted with food coloring for a fingernail effect.
- → How do I get the most realistic bloody effect?
-
Strawberry or raspberry jam creates the most realistic looking blood—it has the right consistency and color. Warm the jam slightly to make it easier to apply thinly around the almond nail bed. Red gel food coloring works too but can look more artificial.
- → Can I make these cookies without almond extract?
-
Absolutely. Replace almond extract with an equal amount of vanilla extract for a classic butter cookie flavor, or try lemon extract for a bright citrus twist. The cookies will still hold their shape and creepy appearance perfectly.
- → Why do my cookies lose their finger shape in the oven?
-
If cookies spread too much, your dough might be too warm. Try chilling the shaped fingers for 15-20 minutes before baking. Also ensure your butter wasn't overly soft when creaming—room temperature butter should yield slightly to finger pressure but not be melting.