 Save to Pinterest
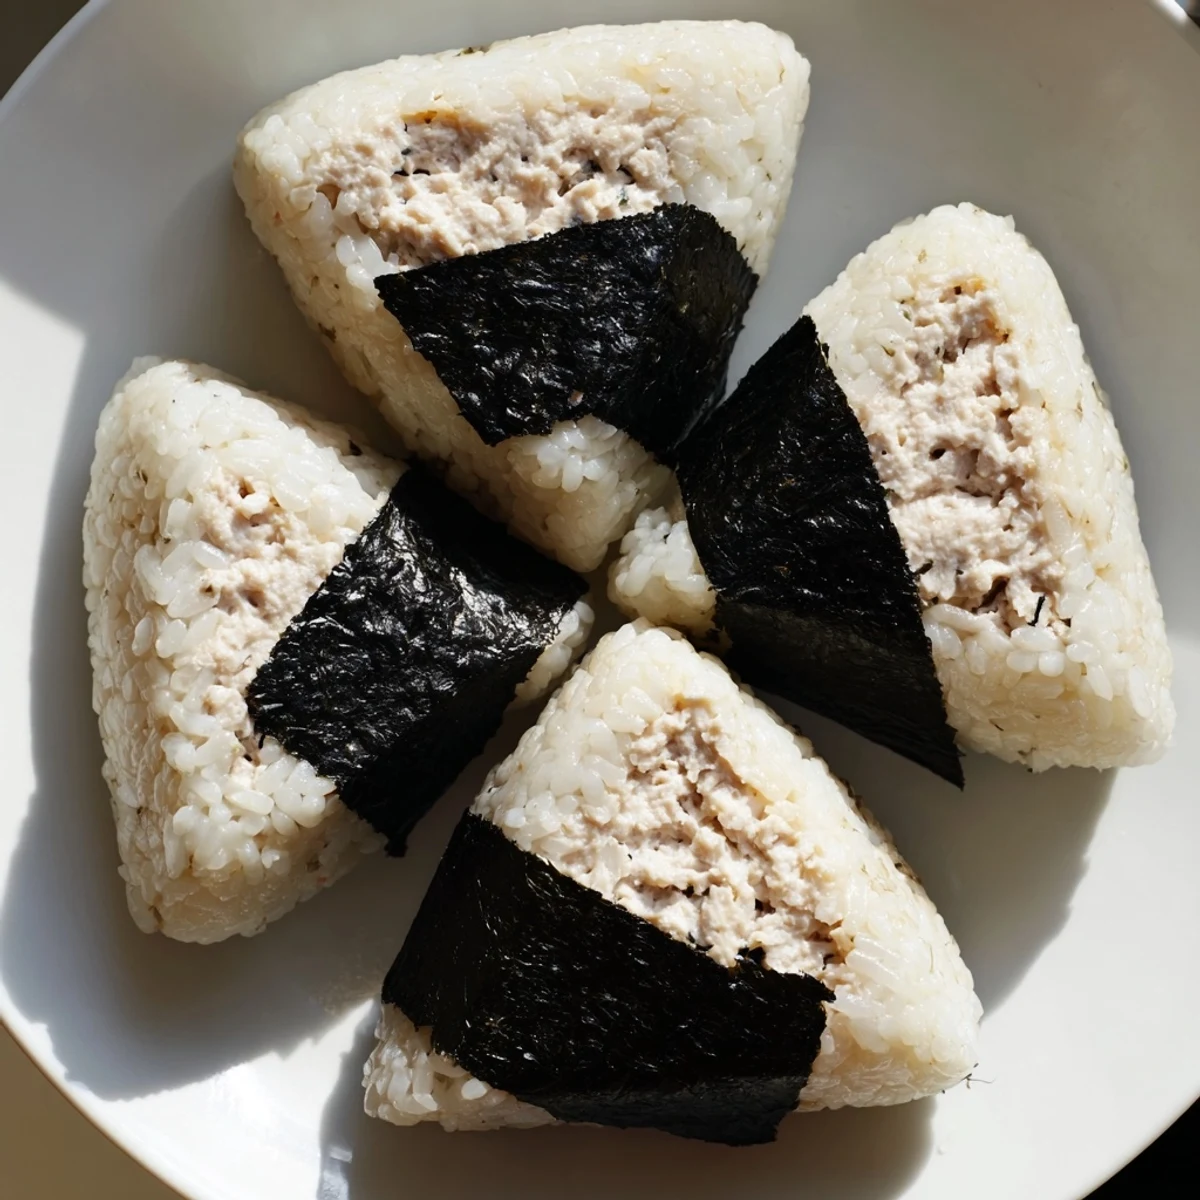
 Create authentic Japanese tuna mayo onigiri with this simple 35-minute method. These handheld rice balls feature a savory center of canned tuna mixed with creamy Japanese mayonnaise and soy sauce, all wrapped in perfectly seasoned short-grain rice. The result is a portable, satisfying snack that's beloved in Japan and increasingly popular worldwide. Each onigiri offers balanced protein and carbohydrates, making them ideal for packed lunches, picnics, or quick meals between activities. The recipe yields six pieces and requires minimal equipment - just a rice cooker or pot, mixing bowl, and your hands for shaping.
There is something deeply satisfying about pressing warm rice into your palms and feeling it take shape, a small triangle of comfort that fits perfectly in your hand. My friend Yuki taught me to make onigiri in her tiny apartment kitchen one rainy afternoon in Osaka, and I have been shaped by that memory ever since. The tuna mayo version was her favorite, a little fusion twist she claimed her grandmother would have disapproved of but made anyway. I still hear her laughing every time I mix the filling.
I started packing these for road trips and picnics after that trip, wrapped tightly in plastic and tucked into a cooler bag. My partner now expects a container of them anytime we drive longer than an hour, and the backseat smells faintly of nori for days afterward.
Ingredients
- Japanese short-grain rice (2 cups): This is non-negotiable because long-grain varieties will not stick together no matter how hard you press, a lesson I learned with a very sad bowl of crumbly rice shards.
- Water (2 1/2 cups): The ratio matters more than you think, so measure carefully for the right tender-chewy texture.
- Canned tuna in water, drained (1 can, 5 oz): Water-packed tuna keeps the filling from becoming greasy, and draining it thoroughly is the key to a cohesive mixture.
- Japanese mayonnaise like Kewpie (3 tablespoons): Kewpie has more egg yolks and a tangier, richer flavor than standard mayo, which is what makes the filling taste distinctly Japanese.
- Soy sauce (1 teaspoon): Just a splash adds umami depth without overpowering the delicate tuna flavor.
- Ground black pepper (1/4 teaspoon, optional): A gentle warmth that rounds everything out, though purists may skip it.
- Salt (1/2 teaspoon): Used on your palms during shaping, it seasons the outside of the rice and acts as a mild preservative.
- Nori sheets, cut into strips (6 small pieces): The crispy seaweed wrap gives each bite a satisfying crunch and keeps your fingers from getting sticky.
Instructions
- Wash the rice well:
- Rinse the rice under cold running water, swirling it with your hand, until the water turns from cloudy to mostly clear, usually four or five changes. Drain it thoroughly in a fine mesh strainer so excess water does not throw off your cooking ratio.
- Cook the rice:
- Combine the rinsed rice and measured water in a rice cooker or heavy-bottomed pot and cook according to your device or package directions. Let it rest covered for 10 minutes after cooking so the grains finish steaming and become easier to handle.
- Mix the tuna filling:
- While the rice rests, break up the drained tuna in a bowl and fold in the mayonnaise, soy sauce, and pepper until you have a thick, creamy paste. Taste it and adjust with a little more soy sauce if it needs punch.
- Prepare your hands:
- When the rice is still warm but cool enough to touch comfortably, wet both hands with water and rub the salt evenly across your palms. This prevents sticking and lightly seasons the outside of each onigiri.
- Shape the first onigiri:
- Scoop about half a cup of warm rice into one hand and press it into a flat disc with a shallow well in the center. Spoon a generous tablespoon of the tuna mayo filling into that well.
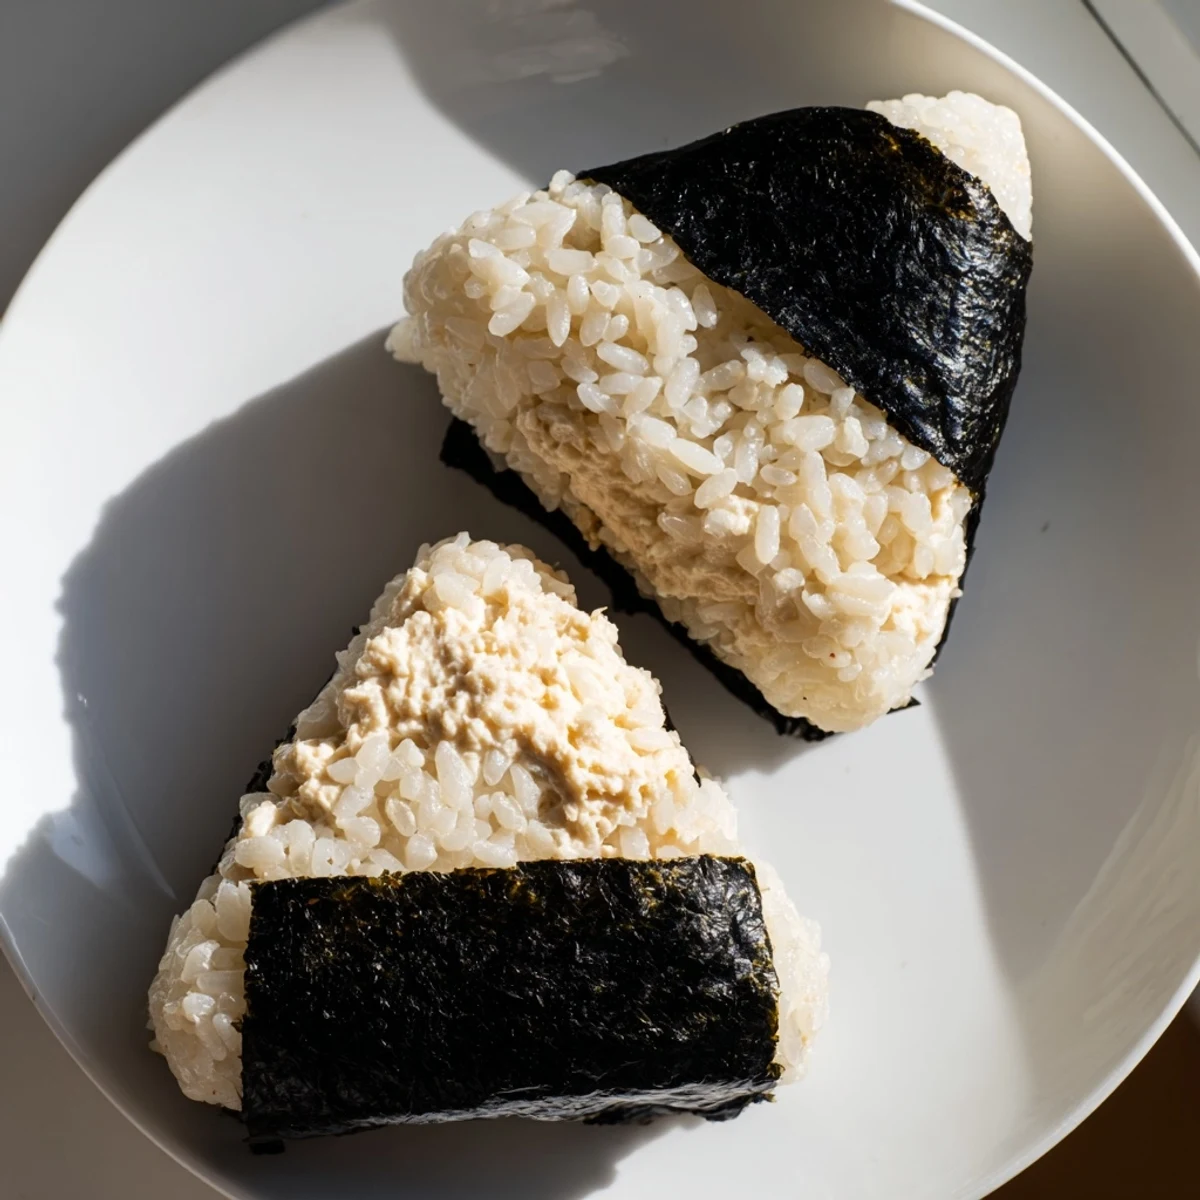
- Seal and form:
- Fold the rice edges up and over the filling, gently cupping and rotating it in your hands to form a triangle or oval shape. Do not squeeze too hard or the rice will become dense, just enough that it holds together when you set it down.
- Wrap with nori:
- Press a strip of nori onto the bottom edge of each rice ball, wrapping it partway around like a little jacket. Serve immediately or wrap tightly for later.
 Save to Pinterest
 One summer afternoon I brought a batch of these to a park gathering and watched a group of toddlers devour them with zero hesitation, nori flaking onto their shirts, rice squished between happy fingers. That was the moment I realized onigiri are truly universal, needing no translation or explanation.
Getting the Rice Right Every Time
The biggest variable in this recipe is the rice itself, and after years of making onigiri I have learned that slightly under-seasoning is better than over-seasoning. You can always dab extra soy sauce on the outside, but you cannot undo salty rice. If your rice cooker has a sushi rice setting, use it, as it produces the ideal balance of tenderness and structure for shaping.
Customizing Your Filling
Tuna mayo is just the beginning of where onigiri can go. Try folding in finely chopped scallions for a fresh bite, a few drops of toasted sesame oil for nutty depth, or even a small cube of sharp cheddar that melts slightly into the warm rice. The formula is simple: something creamy, something savory, and nothing too wet.
Packing and Storing Onigiri
These are best eaten the day they are made, preferably within a few hours, because the nori softens and the rice firms up in the refrigerator. If you need to pack them ahead, wrap each one tightly in plastic wrap and keep the nori strips separate, attaching them just before eating for maximum crunch.
- A damp kitchen towel draped over the bowl of rice buys you about 20 extra minutes of workable warmth.
- Press a small indentation into the top of each onigiri with your thumb to tuck the nori edge under so it stays put.
- Always let the rice rest those 10 minutes after cooking, because impatient rice is crumbly rice.
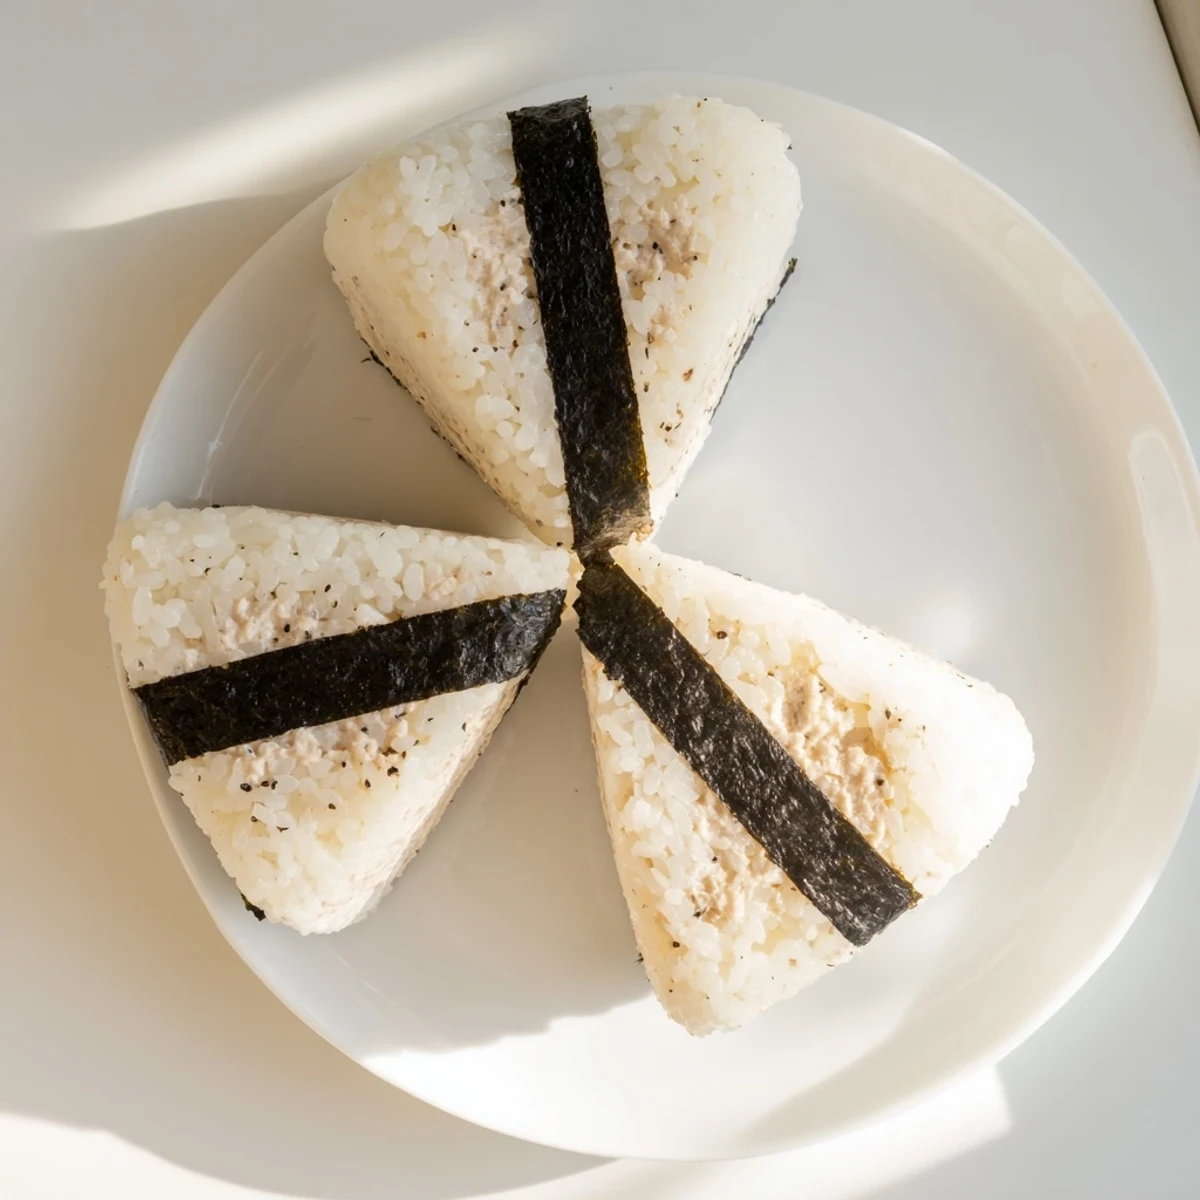 Save to Pinterest
 Keep a batch of these in your repertoire and you will always have something warm, portable, and quietly impressive ready at a moments notice. They are proof that the simplest foods, made with care, are the ones people remember most.
Recipe FAQs
- → What is tuna mayo onigiri?
-
Tuna mayo onigiri is a traditional Japanese rice ball filled with a creamy mixture of canned tuna and Japanese mayonnaise, often seasoned with soy sauce. It's one of the most popular convenience store foods in Japan and beloved as a portable, handheld meal.
- → Can I use regular mayonnaise instead of Japanese mayo?
-
Yes, you can substitute regular mayonnaise for Japanese mayonnaise like Kewpie. However, Japanese mayo has a richer, eggier flavor and slightly sweeter profile that enhances the filling. The taste will be slightly different but still enjoyable.
- → How long do onigiri stay fresh?
-
Onigiri are best enjoyed the same day they're made, ideally within 4-6 hours at room temperature. You can refrigerate them wrapped tightly for up to 24 hours, but the rice may become firm. Let them come to room temperature before eating for the best texture.
- → Do I need a rice cooker to make onigiri?
-
No, you don't need a rice cooker. You can cook Japanese short-grain rice on the stove in a pot. The key is rinsing the rice thoroughly until water runs clear, then using the correct water ratio and letting it rest after cooking for the perfect sticky texture needed for shaping.
- → Why do I need to salt my hands when shaping onigiri?
-
Lightly salting your wet hands serves two purposes: it prevents the sticky rice from adhering to your skin, and it lightly seasons the exterior of each rice ball. This traditional technique also helps preserve the onigiri slightly when packing for later consumption.
- → Can I freeze tuna mayo onigiri?
-
Freezing is not recommended for tuna mayo onigiri because the mayonnaise can separate and the texture becomes unpleasant when thawed. Plain onigiri freeze well, but those with mayonnaise-based fillings are best eaten fresh or refrigerated for up to 24 hours.