 Save to Pinterest
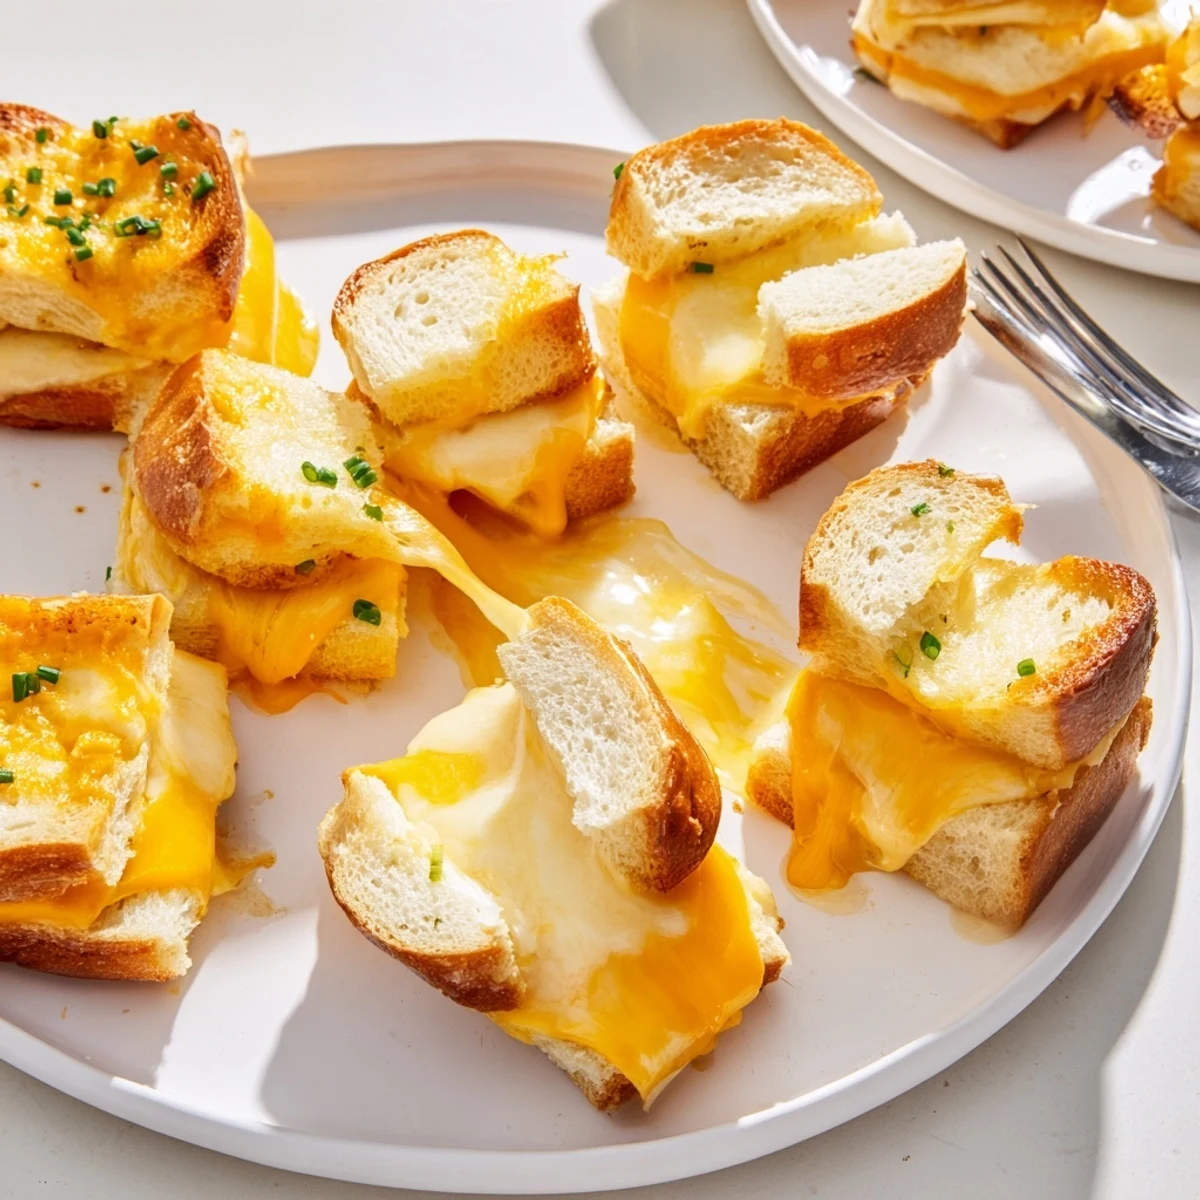
 Turn a slab of soft Hawaiian rolls into 12 bite-sized grilled cheeses: slice the roll slab horizontally, layer halved cheddar (or add Swiss), replace the top, and spread softened butter on the exterior. Grill the slab 3–4 minutes per side in a skillet or bake 10–12 minutes until golden and the cheese is melted. Cool slightly, pull apart into portions, and finish with Dijon or chopped herbs if desired.
If you ever hear bubbling cheese in a warm kitchen, you know something good is happening. The first time these grilled cheese Hawaiian rolls came together was on a rainy afternoon, when I raided the fridge for something comforting yet playful. The sweet, doughy smell of the rolls mixing with melting cheddar instantly brightened the mood. I remember grinning as the butter sizzled, knowing exactly where this snack was headed.
One game night, my sister and I improvised these for a crowd—laughing as melted cheese oozed out the sides and the whole house smelled like a corner bakery. She still texts me a picture whenever she makes them herself, insisting she nails the golden crust every time.
Ingredients
- Hawaiian rolls: Their fluffy, sweet texture makes every bite feel like a treat and keeps the sandwiches extra-soft. I learned the hard way not to separate them before slicing—it’s much easier to handle the whole slab.
- Cheddar cheese: Classic sharpness gives these mini sandwiches richness, and slicing the cheese thinly helps it melt evenly.
- Unsalted butter: Soft butter spreads more gently and prevents tearing the top, plus achieves that crisp, golden edge everyone loves.
- Swiss cheese (optional): Adds a hint of nuttiness if you want variety, and pairs wonderfully with the sweetness of the rolls.
- Dijon mustard (optional): A swipe on top wakes up the flavors, something I discovered after a friend dared me to try it.
- Chopped chives or parsley (optional): Brightens up the look and adds a subtle fresh note at the very end.
Instructions
- Warm up your station:
- Preheat the oven to 180°C (350°F) or heat a large skillet over medium-low until you can feel gentle heat when you hold your hand just above it.
- Slice the rolls:
- Keep the rolls together and use a bread knife to slice them horizontally into a top and bottom slab – there’s no need to separate the individual rolls yet.
- Layer the cheese:
- Lay the bottom slab cut-side up on your board, then tuck sliced cheddar and Swiss (if using) to cover every inch right to the edges.
- Cap it and butter up:
- Place the top slab over the cheese, then gently spread the softened butter across both exterior sides – top and bottom get equal love.
- Cook to golden:
- In a skillet, grill the sandwich slab for 3–4 minutes per side, pressing gently so everything crisps up; or bake in a dish for 10–12 minutes, peeking until the cheese is gooey and the rolls glisten.
- Finish and serve:
- Let them cool a minute, then either pull apart or slice into 12 mini sandwiches for the full pull-apart effect.
- Add the extras:
- If you like, brush with Dijon mustard and top with chives or parsley just before serving for a bright finish.
 Save to Pinterest
 At a birthday brunch, everyone ended up clustered around the platter pulling apart sandwiches, grinning between bites and dunking them in tomato soup. That’s when I realized they’re as good cold as they are hot—if any survive long enough to make it to leftovers.
Making This Snack Your Own
Don’t hesitate to throw in your favorite cheeses or add-ons—once I smuggled thin tomato slices inside for tang, and it turned out to be a hit.
Best Ways to Serve and Share
For parties, I arrange them on a big wooden board with a bowl of dipping sauce, making it practically impossible for guests to resist grabbing one as they pass by.
Tiny Troubleshooting: Common Pitfalls and Easy Fixes
If the cheese isn’t melting thoroughly, just tent foil over the top and let the residual heat do its magic.
- Butter can pool if you rush, so give it a second to soak in before grilling or baking.
- Hover the sandwich over the skillet first—too hot and the bread browns before the cheese melts.
- Test your first cut in the corner for neat edges and maximum cheese pull.
 Save to Pinterest
 Whether you serve these straight from the oven or sneak a bite cold from the fridge, they somehow always bring people closer together. There’s joy in every little cheese pull and crumb.
Recipe FAQs
- → Can I use other bread instead of Hawaiian rolls?
-
Yes. Soft dinner rolls or slider buns work well; choose slightly sweet or neutral buns for a similar balance. For a chewier bite, use brioche halves, and adjust grilling time to avoid over-darkening.
- → What cheeses melt best for these minis?
-
Cheddar and Swiss melt beautifully for flavor and stretch. Mozzarella or pepper jack give a different texture or spice. Choose slices that melt evenly and layer them so heat reaches the center.
- → Skillet or oven—which yields better texture?
-
Skillet cooking gives a crisper, more golden exterior from direct contact and pressing; the oven produces evenly melted cheese and a softer crust across all sandwiches. Both methods work—use skillet for crispness, oven for ease with larger batches.
- → How should I store and reheat leftovers?
-
Store cooled sandwiches in an airtight container in the fridge for up to 2 days. Reheat in a skillet over low heat or in a 180°C (350°F) oven until warmed through to preserve crispness; avoid microwaving to prevent sogginess.
- → Any quick add-ins to boost flavor?
-
Try brushing interiors with Dijon, tucking in thin tomato slices or cooked bacon, or sprinkling chopped chives or parsley after cooking. A smear of mustard or a pinch of smoked paprika also lifts the flavor.
- → Can I make these ahead for a party?
-
Assemble and butter the slab, then refrigerate briefly and bake or grill just before guests arrive. Alternatively, fully bake, cool, and reheat in the oven to maintain texture—finish with fresh herbs for best presentation.