 Save to Pinterest
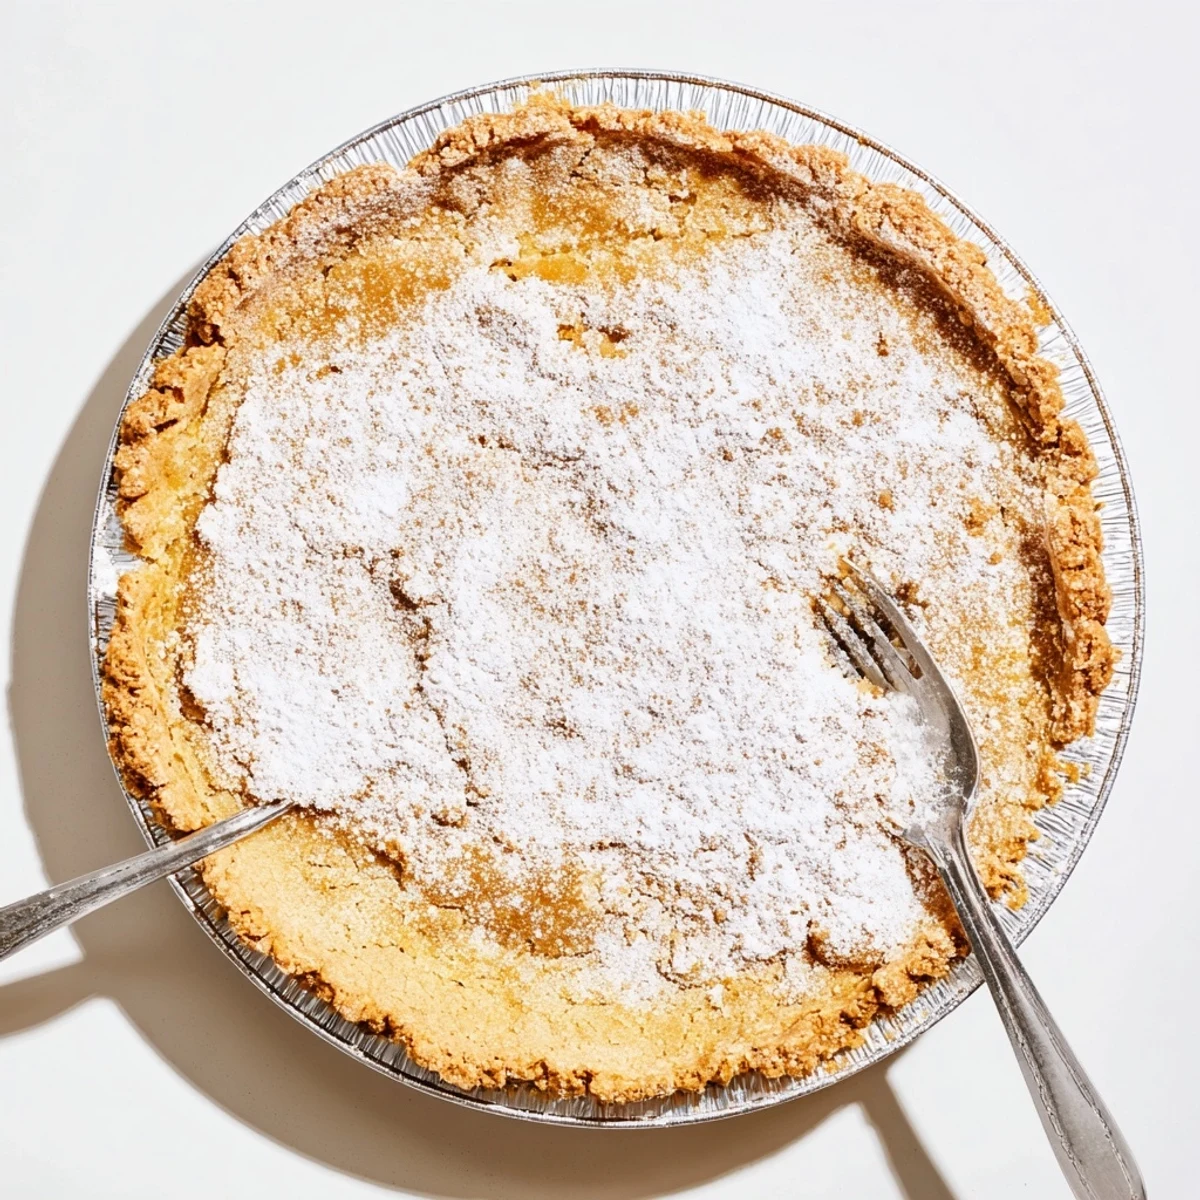
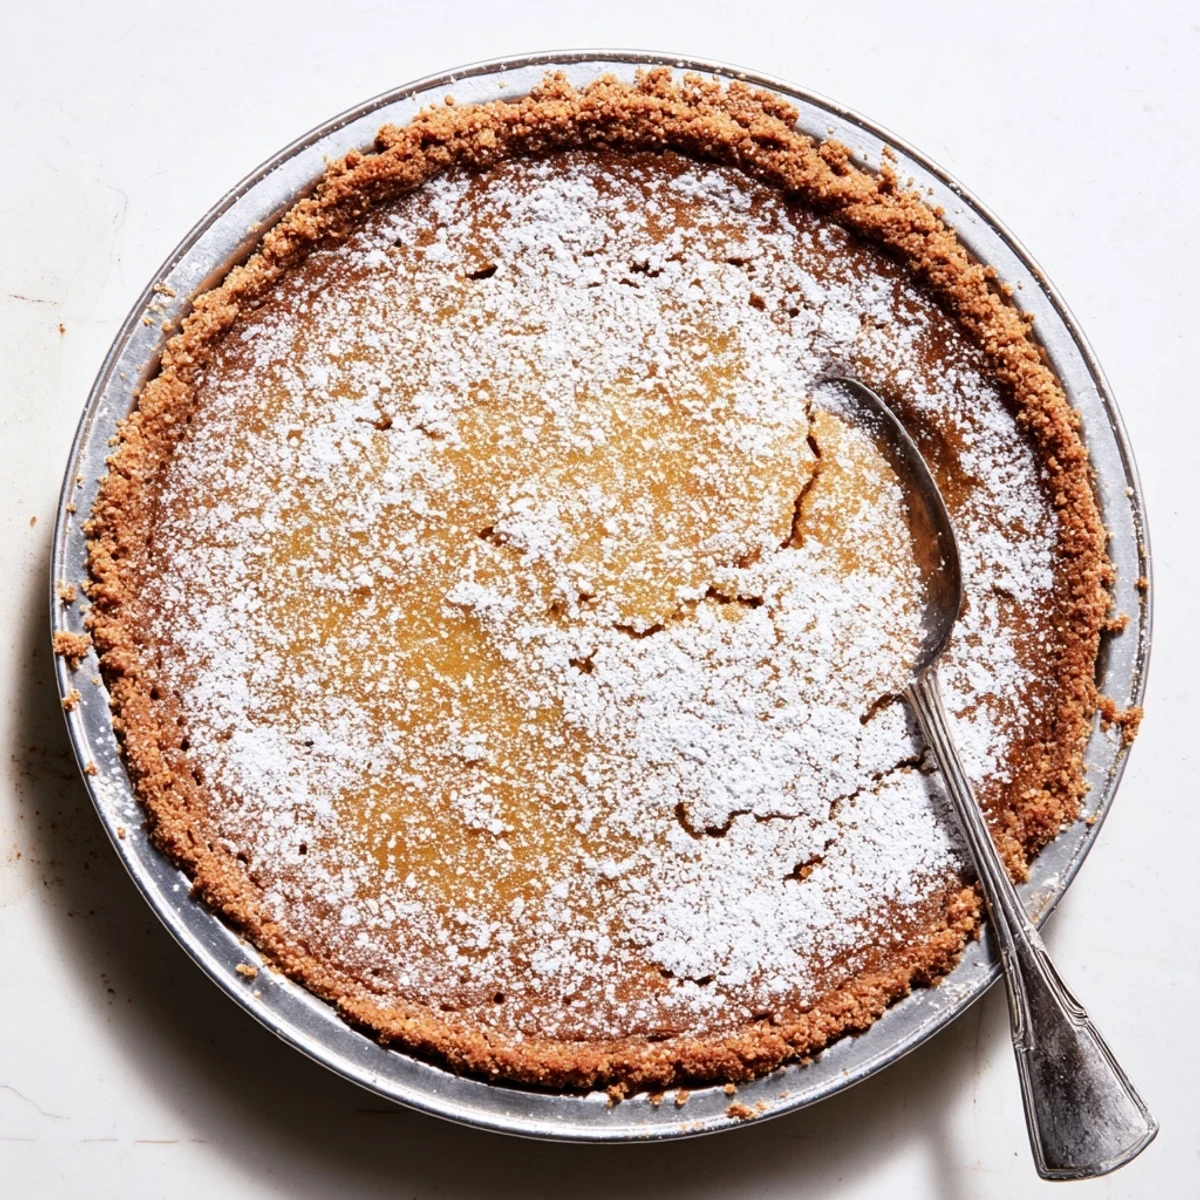
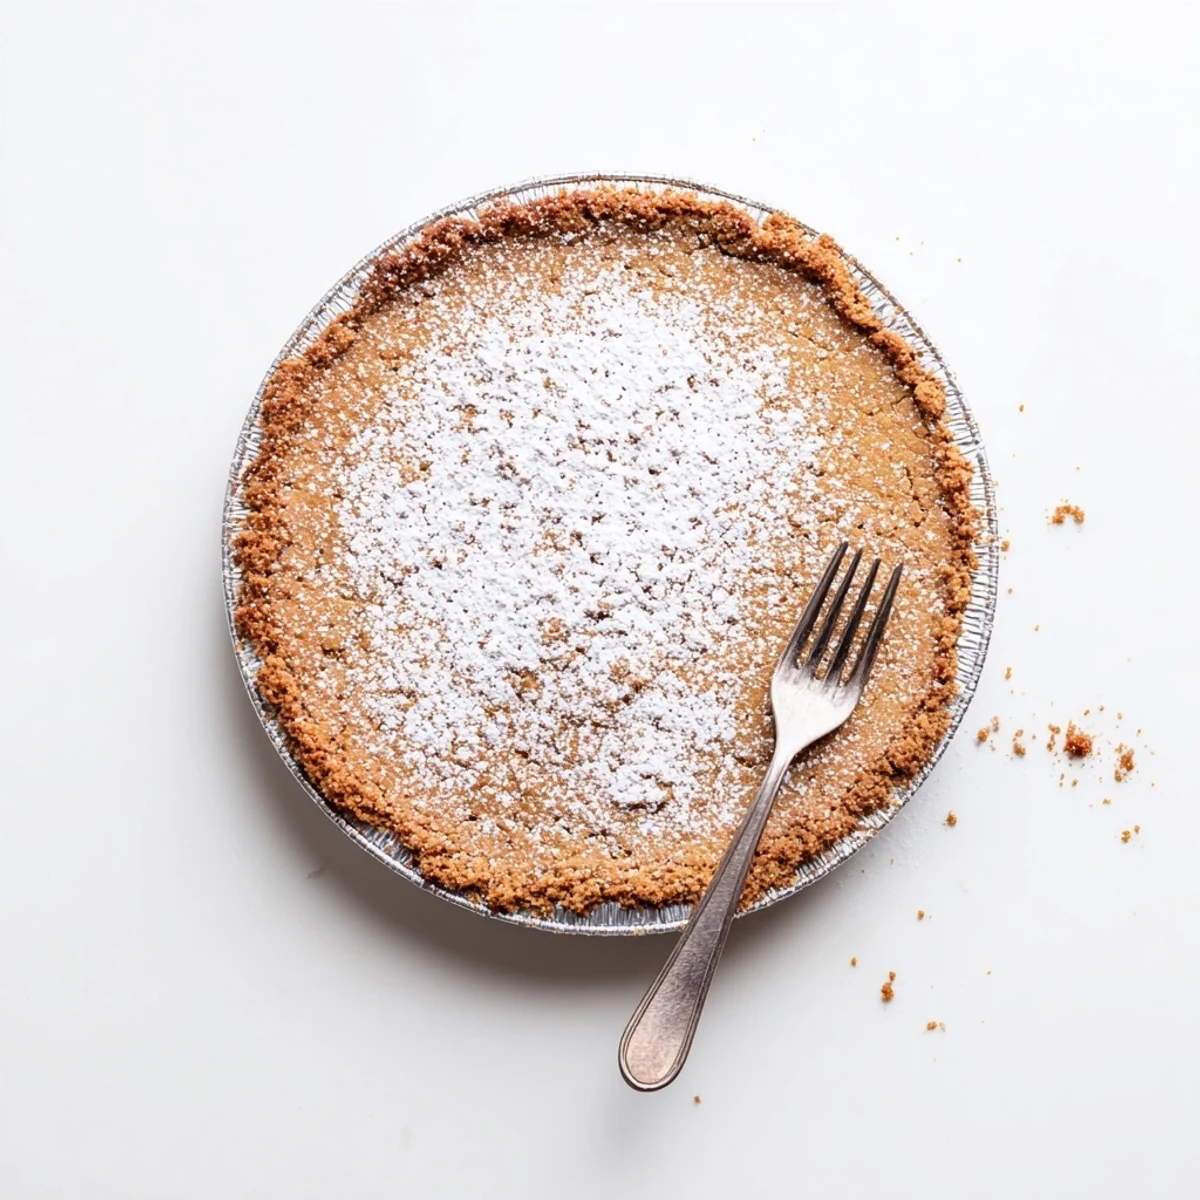
 This iconic dessert starts with a homemade oat cookie crust, baked until golden and then mixed with melted butter to create the perfect crunchy base. The silky filling combines butter, both granulated and brown sugar, milk powder, and vanilla for that signature caramel-like flavor that made this treat famous at Milk Bar bakeries nationwide.
The magic happens during baking—the edges set while the center remains deliciously wobbly, creating that addictive texture. After cooling completely, chilling overnight lets the flavors deepen and the filling set to its ideal consistency. A generous dusting of powdered sugar adds the perfect finishing touch before serving.
Expect extreme sweetness balanced by the oaty, slightly salty crust. The contrast between crisp edges and gooey center makes each bite unforgettable. This generous dessert serves 8-10 people and keeps beautifully in the refrigerator for up to five days, though it rarely lasts that long.
The oven door had a stubborn squeak that afternoon, and every time I opened it to check on the oat cookie base, the sound cut through the radio playing in the corner. I was attempting Milk Bar Crack Pie for a potluck, fully expecting it to be one of those overhyped Brooklyn desserts that sounds better on paper than it tastes. Two hours later I was standing in the kitchen eating it straight from the pan with a fork, completely ignoring the plates I had set out.
My neighbor knocked on the door while the pie was cooling, asking if I had a spare lemon. I handed her the lemon through a cloud of butter and vanilla drifting from the kitchen. She paused, sniffed the air like a cartoon character, and followed the scent inside without being invited. We ate half the pie at my counter and I never did get that lemon back.
Ingredients
- Unsalted butter (crust and filling): Use good quality butter here because there is nowhere for it to hide in this recipe.
- Light brown sugar: Packed tightly into the measuring cup, it gives both the crust and filling that deep caramel undertone.
- Granulated sugar: Balances the molasses notes from the brown sugar and keeps the filling from becoming too one dimensional.
- Rolled oats: Old fashioned oats give the crust a chewy, rustic texture that a plain cookie crust could never achieve.
- All purpose flour: A modest amount provides structure without making anything tough or bready.
- Dry milk powder: This is the secret weapon that makes the filling taste like condensed milk without being wet or heavy.
- Eggs and egg yolks: The combination of whole eggs and extra yolks creates that custardy, barely set center.
- Vanilla extract: Do not skip or skimp on this, because it rounds out every sharp edge of sugar in the filling.
- Baking powder and baking soda: Tiny amounts in the cookie base that help it spread and brown evenly.
- Salt: Essential in both parts of the pie to keep the sweetness from becoming cloying.
- Powdered sugar: A generous blanket of it just before serving adds a slightly bitter edge from the starch that works beautifully.
Instructions
- Bake the oat cookie:
- Cream the softened butter with both sugars until the mixture looks pale and cloudlike, then beat in the egg until fully incorporated. Fold in the oats, flour, baking powder, baking soda, and salt, then spread the dough into a thin, even rectangle on a parchment lined baking sheet and bake at 350F for about 15 minutes until deeply golden.
- Build the crust:
- Let the cookie cool completely, then crumble it into fine crumbs with your hands or a food processor. Mix the crumbs with three tablespoons of melted butter until the texture resembles wet sand, then press firmly into the bottom and up the sides of a 9 inch pie pan.
- Whisk the filling:
- Combine the melted butter, both sugars, milk powder, flour, and salt in a large bowl and whisk until smooth. Add the egg yolks, whole egg, and vanilla, stirring gently until just combined and being careful not to whip air into the mixture.
- Bake low and slow:
- Lower the oven to 325F, pour the filling into the crust, and bake for 30 to 35 minutes until the edges are set but the center still wobbles like gelatin when you gently shake the pan.
- Chill patiently:
- Cool the pie completely at room temperature, then refrigerate for at least two hours or overnight so the filling firms into that dense, fudgy slice you are after.
- Finish with sugar:
- Dust the entire surface generously with powdered sugar through a fine mesh sieve right before slicing, letting it fall like a light snow over the surface.
 Save to Pinterest
 The night I made this for my birthday, three friends sat around my small table arguing about whether it qualified as pie or tart. By the time they reached any conclusion the plate was empty and someone was scraping the crumbs with a spoon.
Serving and Storing Crack Pie
This pie tastes best served cold, straight from the refrigerator, which makes it an ideal make ahead dessert for gatherings. It will keep tightly wrapped in the fridge for up to five days, though in my experience it never lasts that long.
Making It Gluten Free
Swap the all purpose flour for a one to one gluten free blend and use certified gluten free oats, and the result is nearly indistinguishable from the original. Check your milk powder label as well because some brands process on shared equipment.
Pairing and Presentation
A thin slice of this pie beside a cup of black coffee is one of those small combinations that feels like it was designed by someone who truly understood dessert. The bitterness of the coffee cuts through the sweetness perfectly.
- Unsweetened whipped cream spooned over each slice tones down the sugar for guests who prefer less intensity.
- A small pinch of flaky sea salt on top of the powdered sugar adds a sophisticated touch.
- Always use a sharp knife wiped clean between cuts for neat, bakery style slices.
 Save to Pinterest
 Some desserts earn a place in your regular rotation through nostalgia, but Crack Pie earns it through sheer, irresistible indulgence. Make it once and you will understand why people quietly admit to being powerless against it.
Recipe FAQs
- → Why is it called crack pie?
-
The name refers to its notoriously addictive quality—once you start eating, it's hard to stop. The combination of sweet, salty, buttery, and gooey textures creates an irresistible flavor profile that keeps people coming back for more.
- → Can I make this gluten-free?
-
Yes! Use certified gluten-free rolled oats and substitute the all-purpose flour with a 1:1 gluten-free flour blend. The texture and flavor remain excellent with these simple swaps.
- → How long should I chill crack pie before serving?
-
For the best texture and flavor, refrigerate for at least 2 hours, though overnight chilling is ideal. This allows the filling to fully set and develop that characteristic gooey consistency.
- → Why is milk powder added to the filling?
-
Dry milk powder enhances the caramel flavor and creates a creamier, more velvety texture. It's the secret ingredient that gives this dessert its distinctively rich, buttery taste.
- → Can I freeze crack pie?
-
Yes, wrap the cooled pie tightly in plastic wrap and foil, then freeze for up to 1 month. Thaw overnight in the refrigerator before serving and add fresh powdered sugar just before eating.